
Learn how to make aesthetic chocolate dipped strawberries for any occasion in just a few easy steps! Originally published February 2017. Last updated February 2023.
Making a Valentine's Day gift at home this year? Let me teach you how to make chocolate covered berries like a professional in just a few minutes from the comfort of your home kitchen. Plus my secret tips for how to make chocolate dipped strawberries look fancy.
If you enjoy this recipe, you'll also love my date caramel chocolate snicker bars, strawberry brownies or strawberry cream cheese sheet cake!
What You'll Need for this Recipe
Just like the recipe, your ingredient list is short and sweet. Here's what to add to your grocery list.
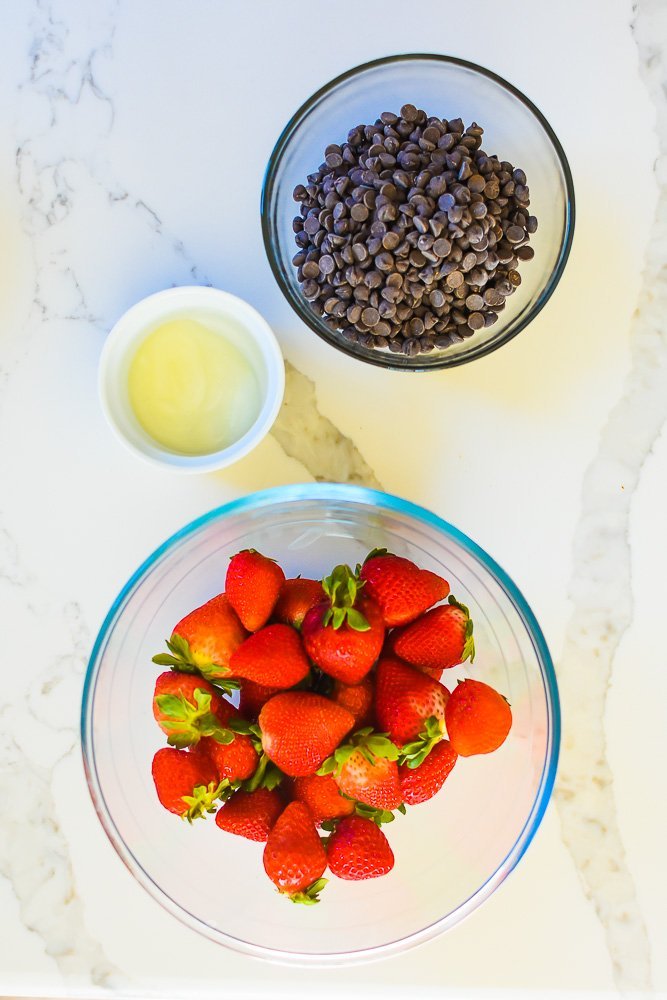
- Chocolate is a given. I use baking chocolate or chocolate chips for the best melt. Dark or semi-sweet chocolate and milk chocolate work well, in my experience. and so does white chocolate, however, it burns much more quickly.
- Coconut Oil helps smooth out the chocolate and keeps it in a liquid state long enough for dipping. You can use another kind of oil if you don't have coconut oil on hand.
- Strawberries, of course. Fresh strawberries are what works best here. Check out my tips for spotting the best ones in the produce section below!
Tips & Tools
Grab a bowl for the melted chocolate. You'll want to use a smaller bowl that has a rounded slope and is at least five inches deep. This ensures you have a nice pool of chocolate to dip into over time without the berries hitting the bottom. So skip wide and shallow vessels with flat bottoms like tupperware.
Also grab some wax paper to place the berries on so they can dry without sticking. I like to line a sheet pan with the wax paper for easy transfer into the refrigerator, if needed.
How to prepare strawberries for dipping in chocolate? To prep the berries, rinse in cold water with a teaspoon of white vinegar or fruit and veggie wash to clean. Pat them dry to make sure the chocolate will stick well.
Which kind of chocolate is best? I recommend using chocolate chips or baking chocolate over those ready made melt bowls for the primary dip. These candy melts are more prone to burning, you have to check them more frequently when melting, and they don't stay liquid for as long. I will use the wafer melts to add layers or decorations, though.
How to store? Store strawberries dipped in chocolate in the refrigerator. They'll keep for about a week this way. Storing them in an airtight container is not a requirement however, it will help prevent the berries from picking up other scents and flavors in the fridge.
Can I freeze chocolate covered strawberries? Yes, for up to three months. Just keep in mind that they won't thaw out to the same plump texture and presentation. Freezing chocolate berries works well if you want to keep them on hand for a snack, though!
Picking Strawberries for Chocolate Covered Strawberries
Look for strawberries that are bright or dark red. Texture-wise, they should be slightly soft but not mushy. They will have just a slight give when gently squeezed. This indicates they are ripe, sweet, and juicy. Look for berries that are uniform in size for the best presentation. But I personally find that different sizes are natural and perfectly ok.

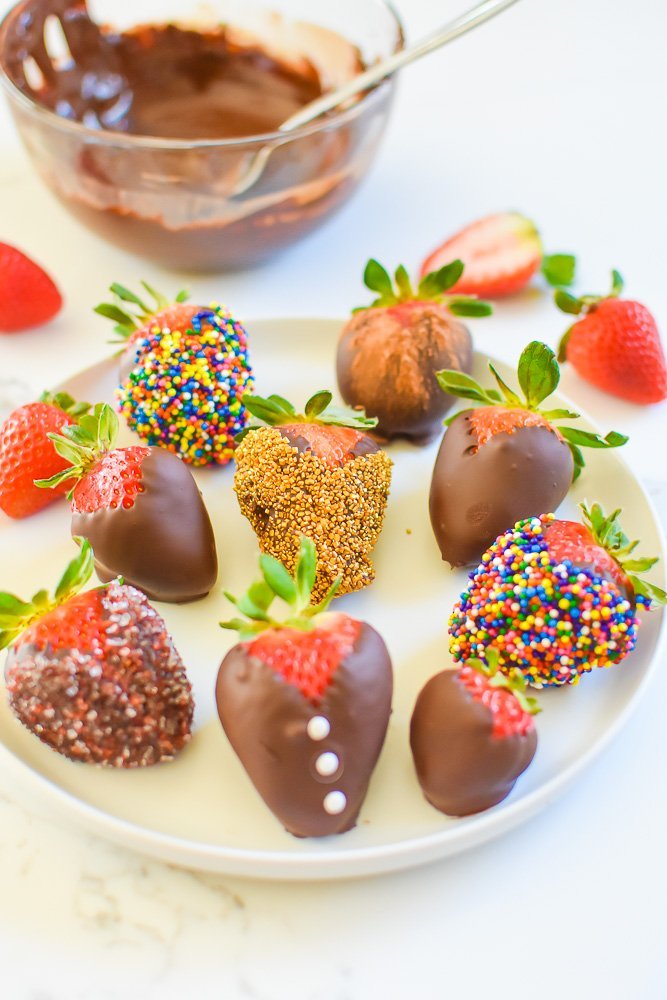
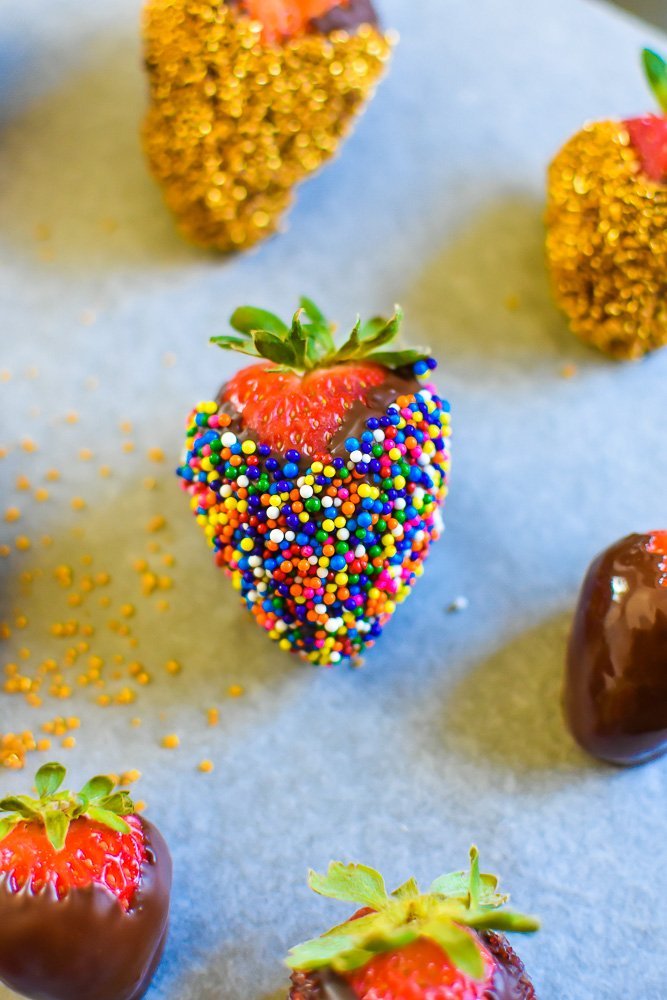
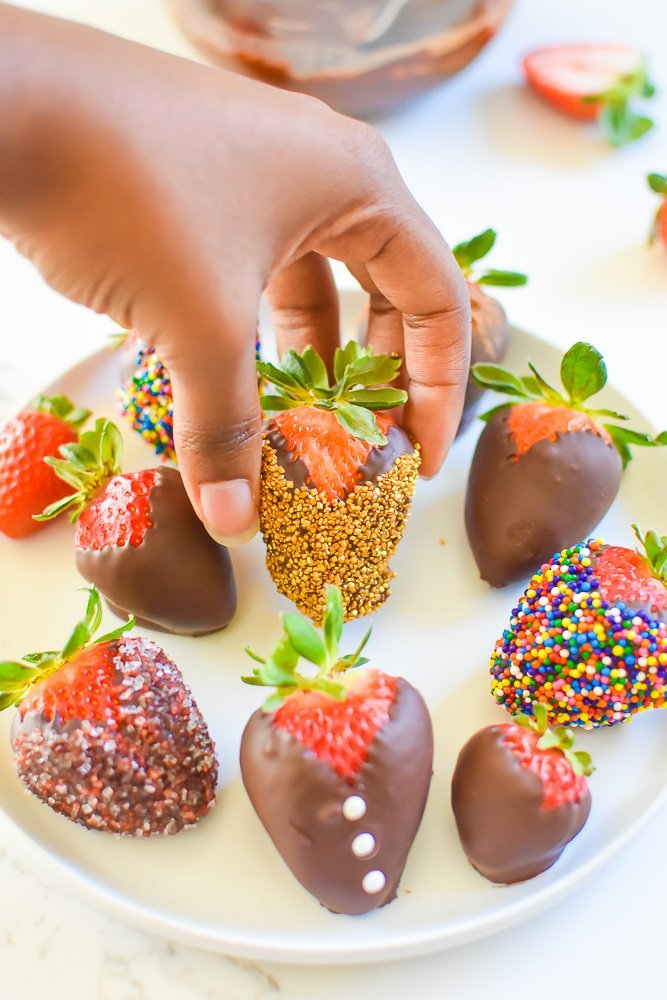
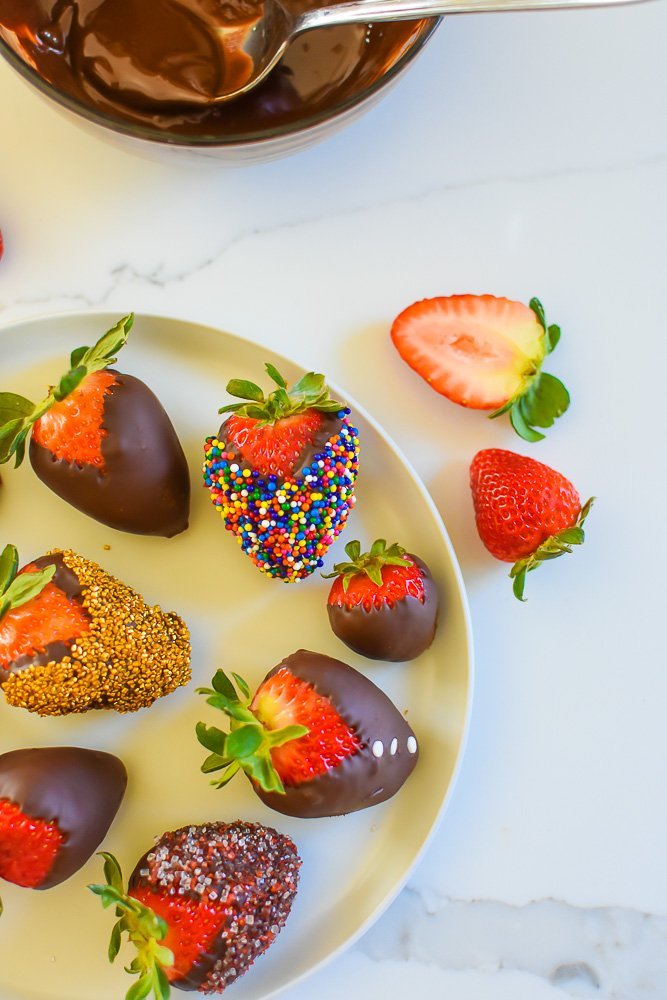
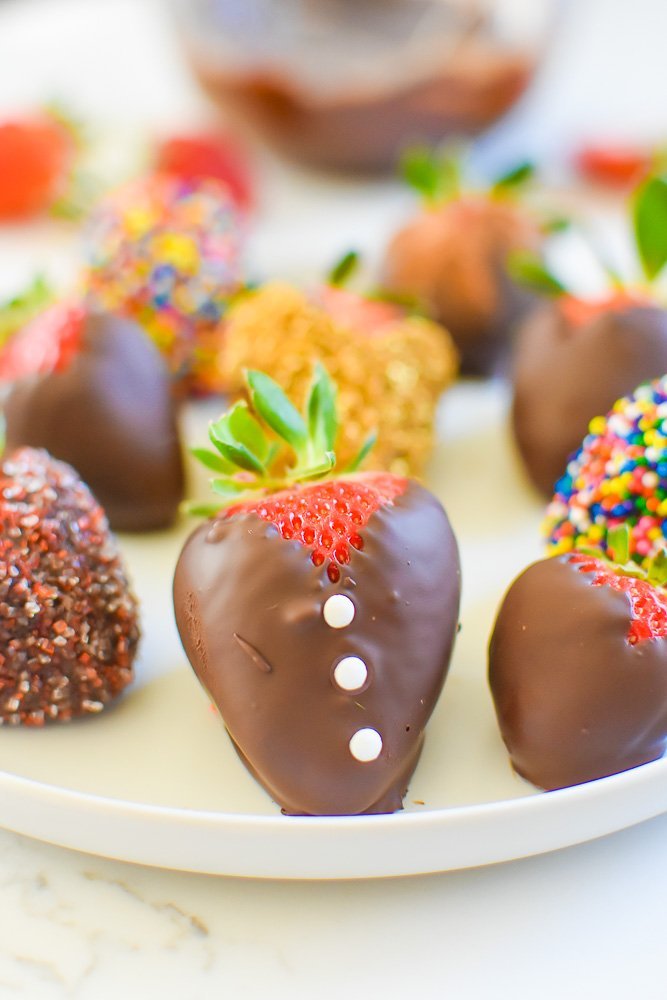
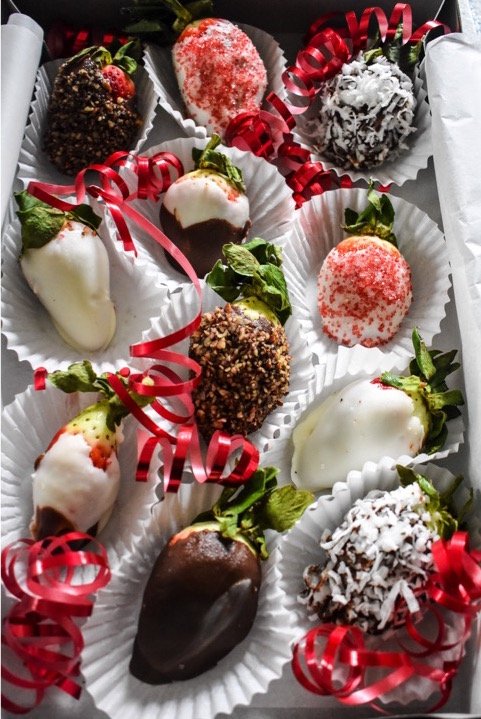
Decorating Chocolate Berries for Holidays
There's lots of room to get creative with colors, toppings, and presentation depending on the occasion. I've made funfetti chocolate covered strawberries for birthday parties and chocolate covered berries for Christmas with red and green sprinkles and crushed candy canes!
Here are are few decoration ideas to get you started.
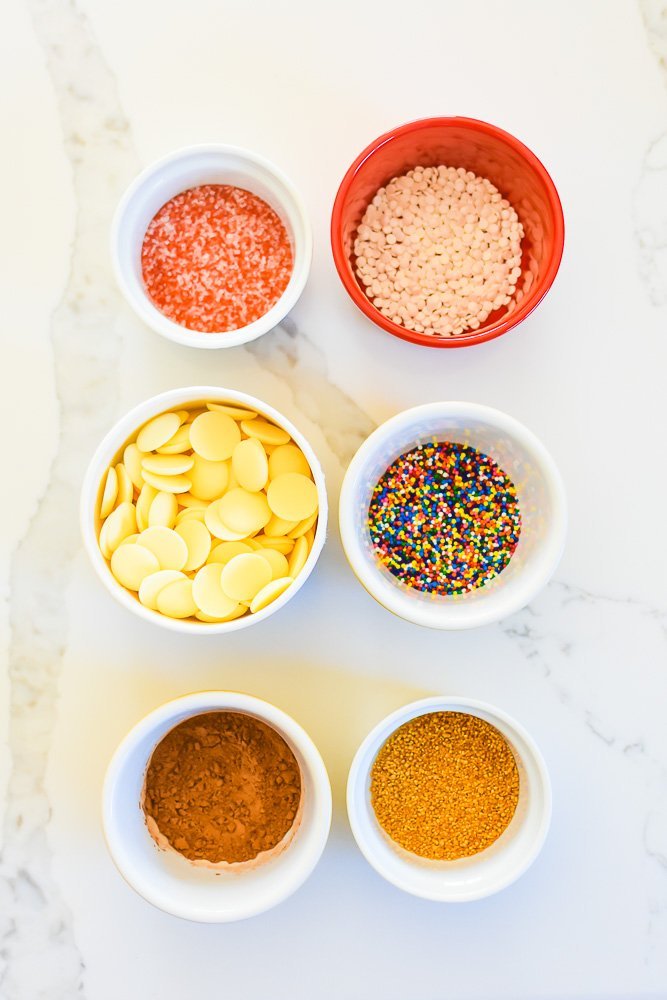
- Cake Crumbs
- Chopped Nuts
- Cocoa Powder
- Crushed Candy
- Flake Coconut
- Mini Chocolate Chips
- Peppermint Crunch
- Sprinkles
How to Serve
For years, my friends and family members hit me up to create homemade fruit arrangements for Valentine's Day. Here are creative ways to serve chocolate covered strawberries year round!
Add the berries to other desserts: I love putting homemade white chocolate covered strawberries on top of my red velvet cake.
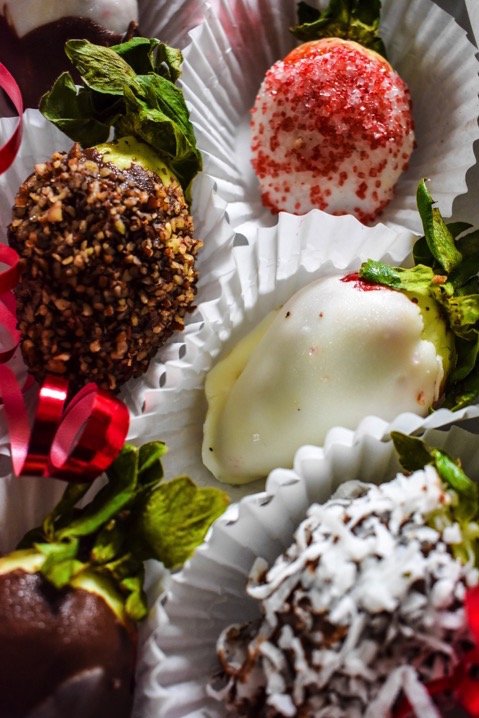
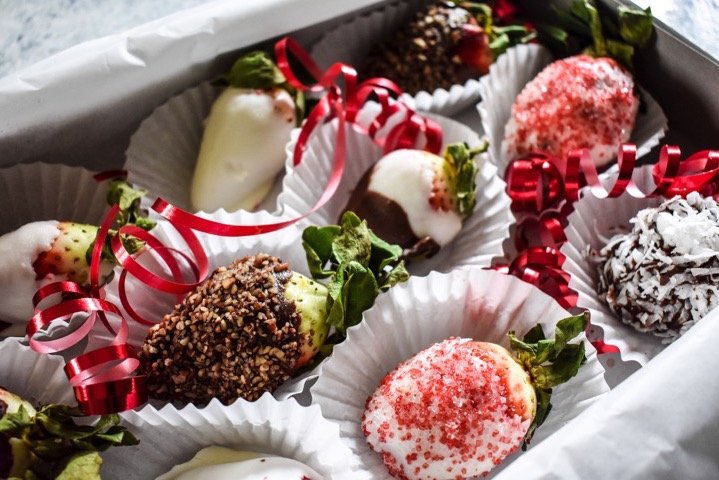
Homemade box of chocolate covered strawberries: Place each berry in a cupcake liner and display them in a gift box lined with tissue paper and wax paper.
DIY romantic fruit arrangements: Make a chocolate-covered strawberry bouquet by inserting a bamboo skewer into the hull (leaf end) of each decorated berry and arranging them in a box.
Edible fruit display: These centerpieces are always a hit at parties and chocolate strawberries make them even more special.
More Favorite Romantic Recipes
Strawberries & Champagne Donuts
Step-by-Step Instructions
1. First, wash the strawberries then pat dry and lay them out on wax paper.
2. Set out your toppings in small bowls or plates so they'll be ready for dipping.
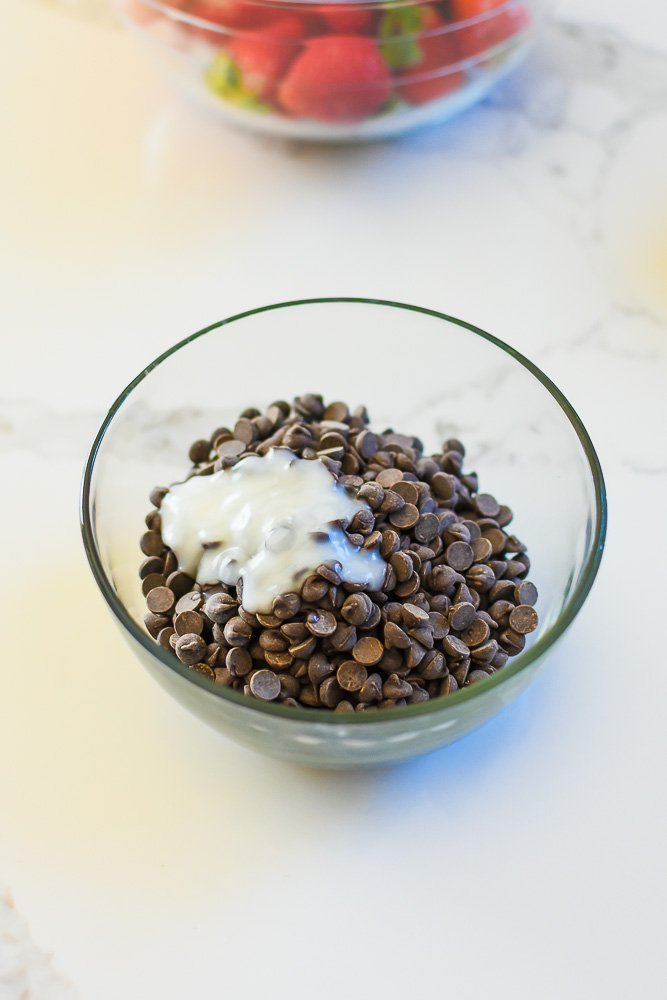
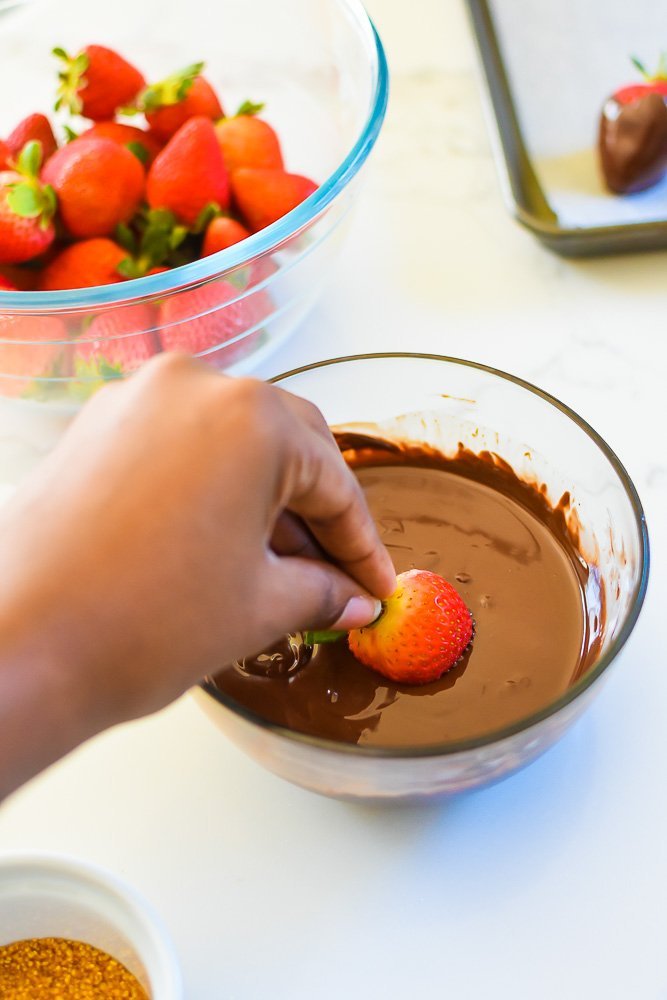
3. Heat the chocolate and oil in the microwave in 30 second increments, stirring between each to check the chocolate and prevent burning.
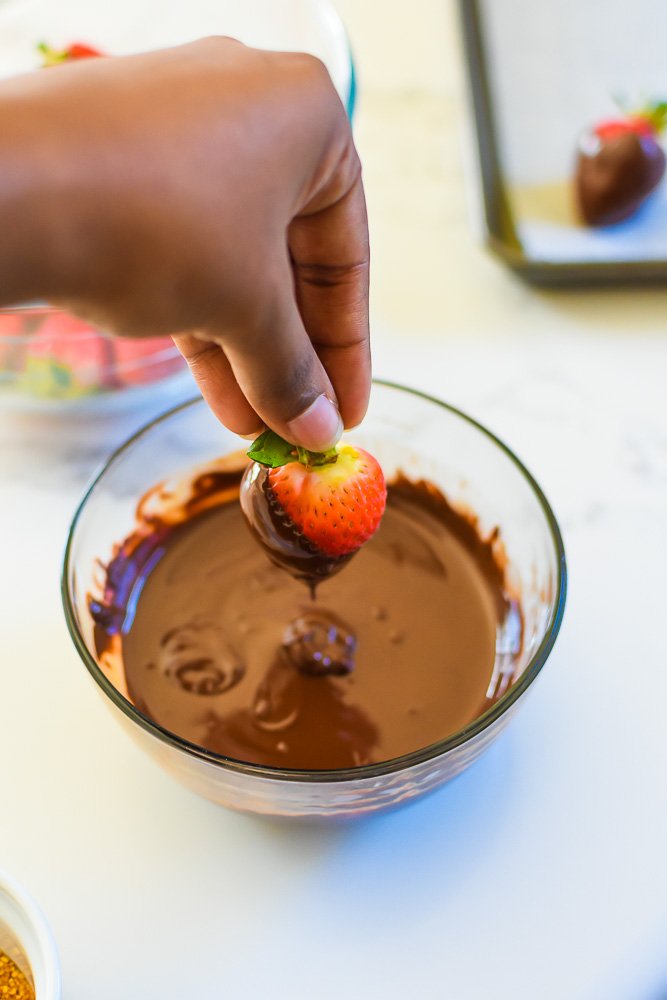
4. Carefully dip each strawberry into the chocolate then into the toppings and decorations of your choice.

5. Set each decorated berry on wax paper to allow the chocolate to harden and dry.

I challenge you to put your spin on a DIY chocolate covered fruit arrangement with these tips. And sharing is caring so be sure to pin this recipe for later and follow me over on Pinterest. Thanks for reading!

Chocolate Dipped Strawberry Recipe
📖 Recipe

DIY Chocolate Covered Strawberries
Ingredients
- 1 pint strawberries
- 5 ounces semi-sweet baking chocolate
- 1 tablespoon coconut oil
Instructions
- Wash strawberries in cold water and a teaspoon of vinegar. Pat dry and set aside.
- Line a sheet pan with wax paper and set aside. Arrange any decorations in bowls or plates for dipping to have on hand.

- Add chocolate and coconut oil to a small, rounded bowl and microwave in 30 second increments. Stir the chocolate after each 30 seconds to check how much it has melted and prevent burning. The chocolate should be smooth, glossy, and free of lumps. About 1 ½ minutes total.
- Grip the leaves or stem of a strawberry and dip into melted chocolate at a 45 degree angle.
- Angle strawberry in opposite direction then dip again. Add any desired decorations
- Then transfer to prepared sheet pan to allow chocolate to harden and dry. About 10 minutes.


Notes
Nutrition


val says
These look so great! I know my kids would love to help make them too. Great post!
lesleysullivan4 says
What a cute idea! I'll have to try it with coconut, I've never thought to add that!
Brittany from The Purple Truths says
You are very creative. These look beautiful! Have you considered selling these for a profit?
Rochelle says
These look so yummy ! Thanks for sharing this tutorial !
projcouture says
Omg this is so gorgeous, and it looks so yummy!
Krysten says
Oh my gosh what gorgeous ideas! I am definitely making this for hubby for valentine's day!
creativethriftychef says
I am gonna attempt on making this, with that being said each time I make this kind of stuff it always end-up messy and not right hahahha. Talking for sharing this lady.
Jazz says
The great thing about these is that even if they get messy, they'll still be delicious! And you can always cover it up with more toppings. 🙂 thanks for reading!
Demetra says
Wow these look delicious. Absolutely gorgeous. Anyone be so happy to receive a box of these beauties
Jacki says
This is gorgeous! I love the way it turned out. Definitely have to give it a try.
tkmom18 says
I love these! I bought one for my mother a few years ago but the woman stopped making them. I will definitely try this this year!
Momma To Go says
These look so fancy yet fairly simple!!! Oh and delicious happy Valentine's Day!
Jazz says
Happy Valentine's Day to you, too! Thanks for reading!
Tam says
What a great creative idea! Thanks for sharing!