
This is a sponsored post written by me on behalf of Cricut. All opinions are 100% mine.
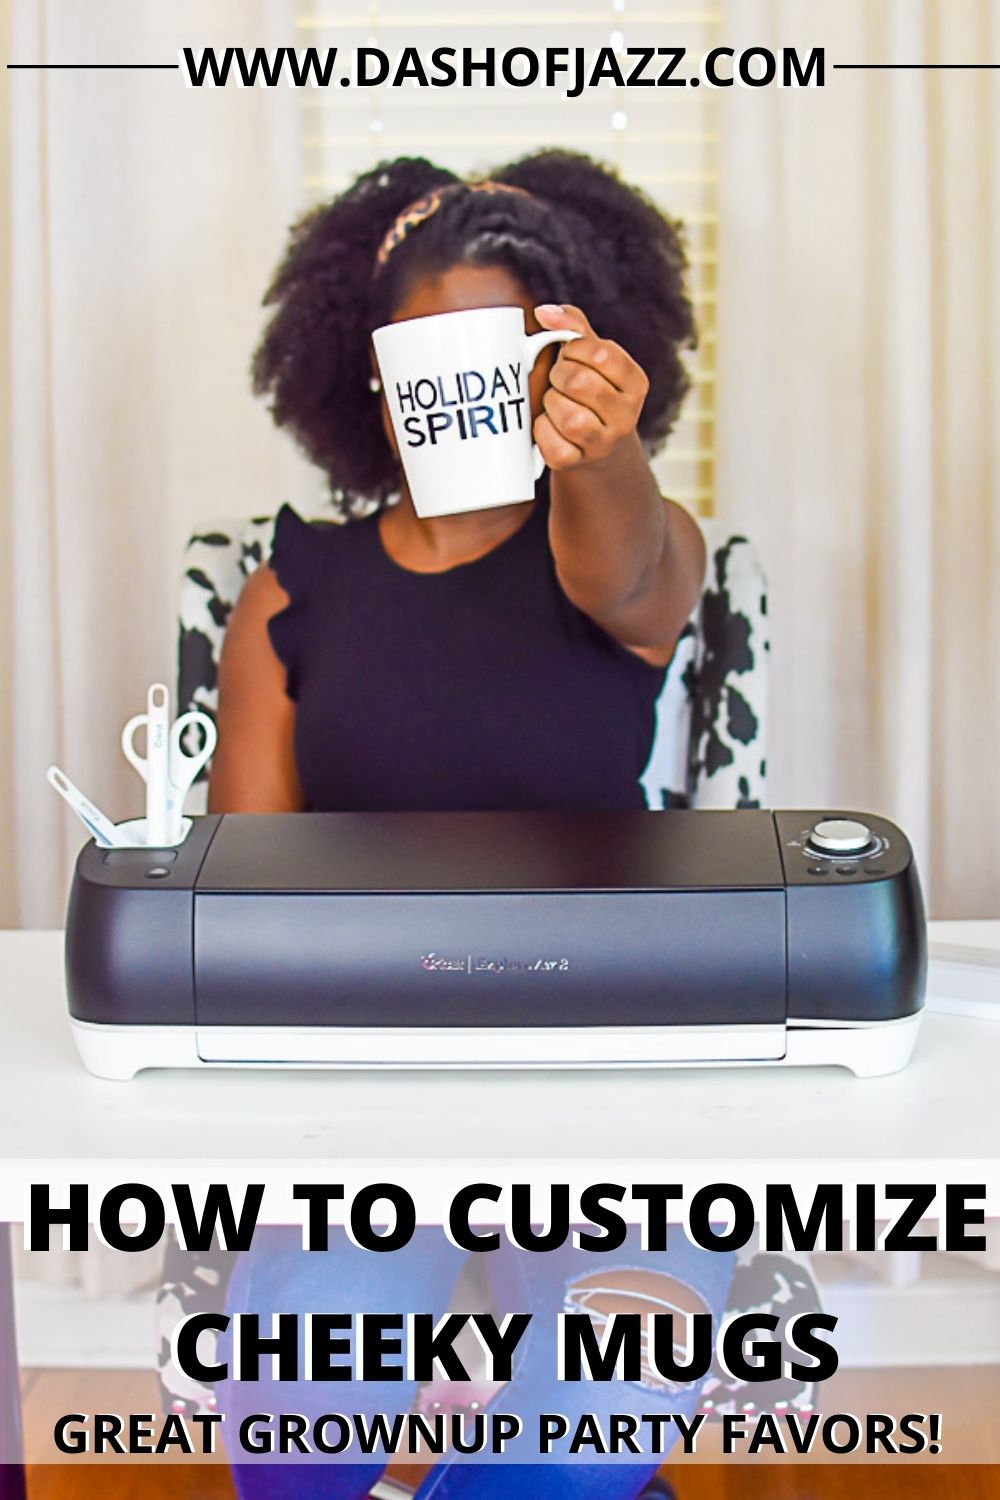
Last year, I got hooked on using my line sister's Cricut machine for custom party projects. This year, I was blessed with a Cricut Explore Air 2 of my own and thought I'd share with you just how easy it is to customize holiday mugs with Cricut. I gave these away as holiday party favors at my last Christmas kickback and they were such a hit! Let's get into how to make vinyl mugs with Cricut so you can get this DIY magic in your life, too.Past Cricut Party Projects
- Beyonce Lyric Wine Glasses for Adrianne's Bridal Shower
- Custom Happy Birthday Masks for Daddy's 60th

First off, What is a Cricut Machine?
Cricut machines precisely cut designs and words into a variety of materials for craft projects including paper, vinyl, and fabric. You can make decals, cards, stickers, iron-ons, and more with them. As I mentioned, I have the Cricut Explore Air 2, which is what I used to customize these holiday mugs. There's also the Cricut Joy, which is more compact and great for smaller projects. If you want to get more professional with it, there's the Cricut Maker. And lastly, there's the Cricut Easy Press, which I also have. It makes iron-on projects a breeze and I have plans to make dozens of cute onesies with it soon, as my brother and sister-in-law are expecting a bundle of joy! I used the Easy Press to make custom face masks for my dad's 60th birthday party a little while ago.
What You'll Need for this Project
- Blank Mugs - I just grab them from the dollar store.
- Cricut Machine - This DIY holiday mugs project is possible with the Cricut Explore Air 2, Cricut Maker, or Cricut Joy. Each of these is currently on sale so this is a great time to grab one if you've had your eye on it.
- Cricut Scraper Tool
- Cricut Weeder Tool
- Machine Mat
- Transfer Tape
- Vinyl in the color(s) of your choice
Customize Holiday Mugs with Cricut FAQ
If you're wondering how to put vinyl on mugs, scroll down to the how-to card below for all the details. It's really easy to customize holiday mugs with Cricut but there are a few questions that might come up, especially if this is your first project.- How to remove vinyl from glass? If you place your words in the wrong spot or just want to change something, no worries. Use a razor blade to carefully scrape off the vinyl and any adhesive left behind. Then wash the mug and you're ready to start over.
- Can mugs with vinyl be microwaved? To ensure they last a long time, I don't recommend putting Cricut custom mugs in the microwave as this can cause the design to fade and deteriorate.
- Are Cricut mugs dishwasher safe? Cricut recommends hand-washing to be safe but this sealing step will come in handy if you want to know how to make your Cricut project dishwasher safe.
- Is Cricut vinyl permanent? To make this project really last, make sure to take note of the tips above and check out Cricut Permanent Vinyl.


- DIY Holiday Photo Booth with Dollar Store Materials
- How to Build Your Own S'Mores Bar
- Make a Wine Cork Garland
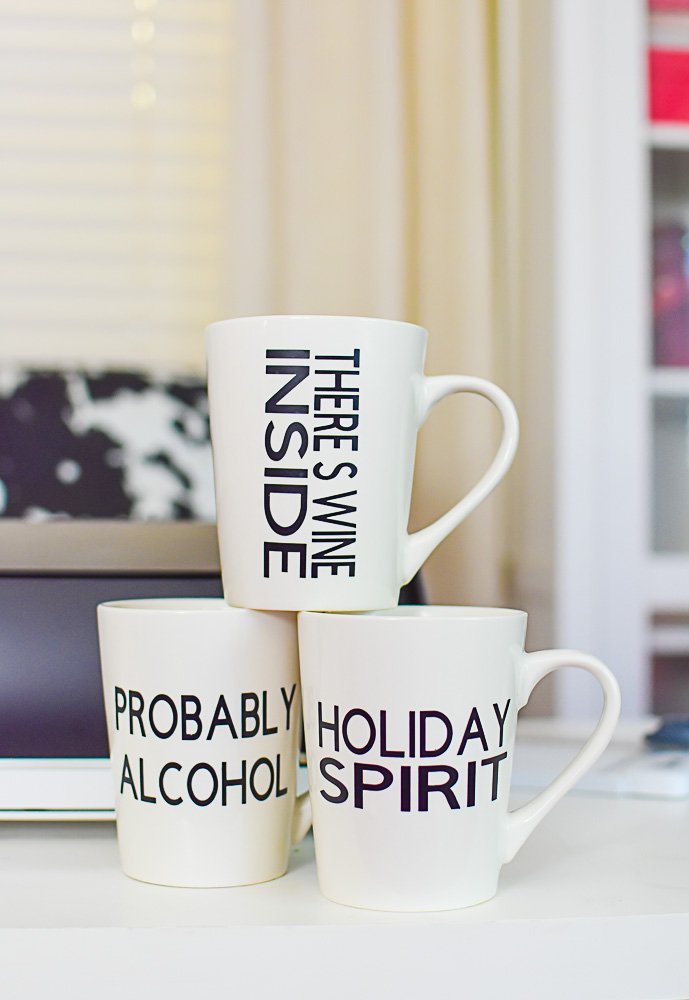
How to Customize Holiday Mugs with Cricut

Custom Cheeky Holiday Mugs
How to use a Cricut machine to create custom holiday mugs with cheeky messages.
Servings: 1 mug
Equipment
- Cricut Explore Air 2
Ingredients
- 1 blank mug any color
- 1 alcohol wipe or cotton ball dampened with alcohol
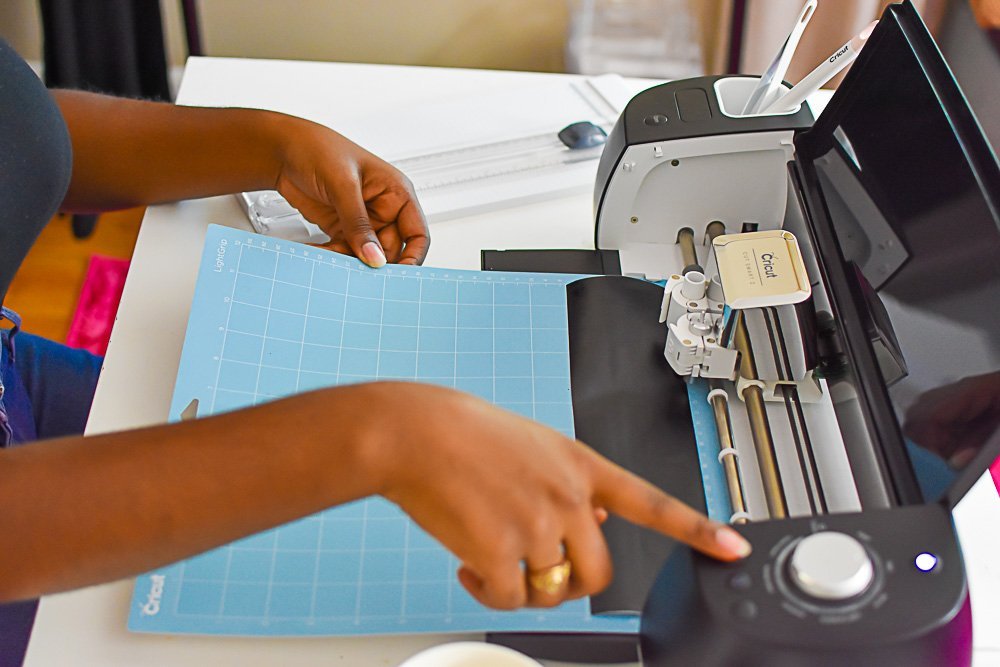
- cutting mat
- 1 roll vinyl any color
- scissors
- Cricut weeding tool
- 1 roll transfer tape
- Cricut scraper tool
Instructions
- Wash and dry mug then use an alcohol wipe to remove any unseen residue or dust.
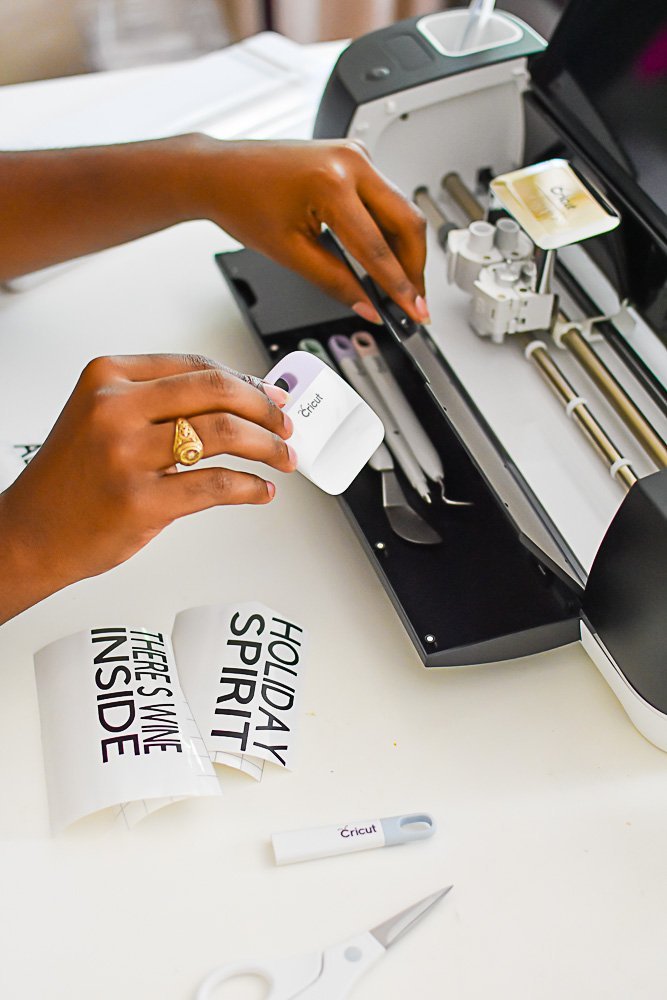
- Measure mug to determine the dimensions of your desired phrase. Input phrase with dimensions in Cricut Access then follow the on-screen steps to make it with your Cricut machine. *Be sure to cut a piece of vinyl just slightly larger than the dimensions of your phrase in order to avoid waste.
- Using the Cricut weeding tool, remove excess vinyl from around the cut phrase.
- Place a piece of of transfer tape over top of the phrase then use the Cricut scraper tool to bond the transfer tape to the letters. Scrape from side to side and up and down in order to ensure a good bond.
- Peel away transfer tape, along with letters and place in desired position on outside of clean, blank mug. Repeat scraping steps again to bond letters to mug.
- Carefully peel away transfer tape to reveal your customized mug.


Love this recipe? Leave me a Comment!