

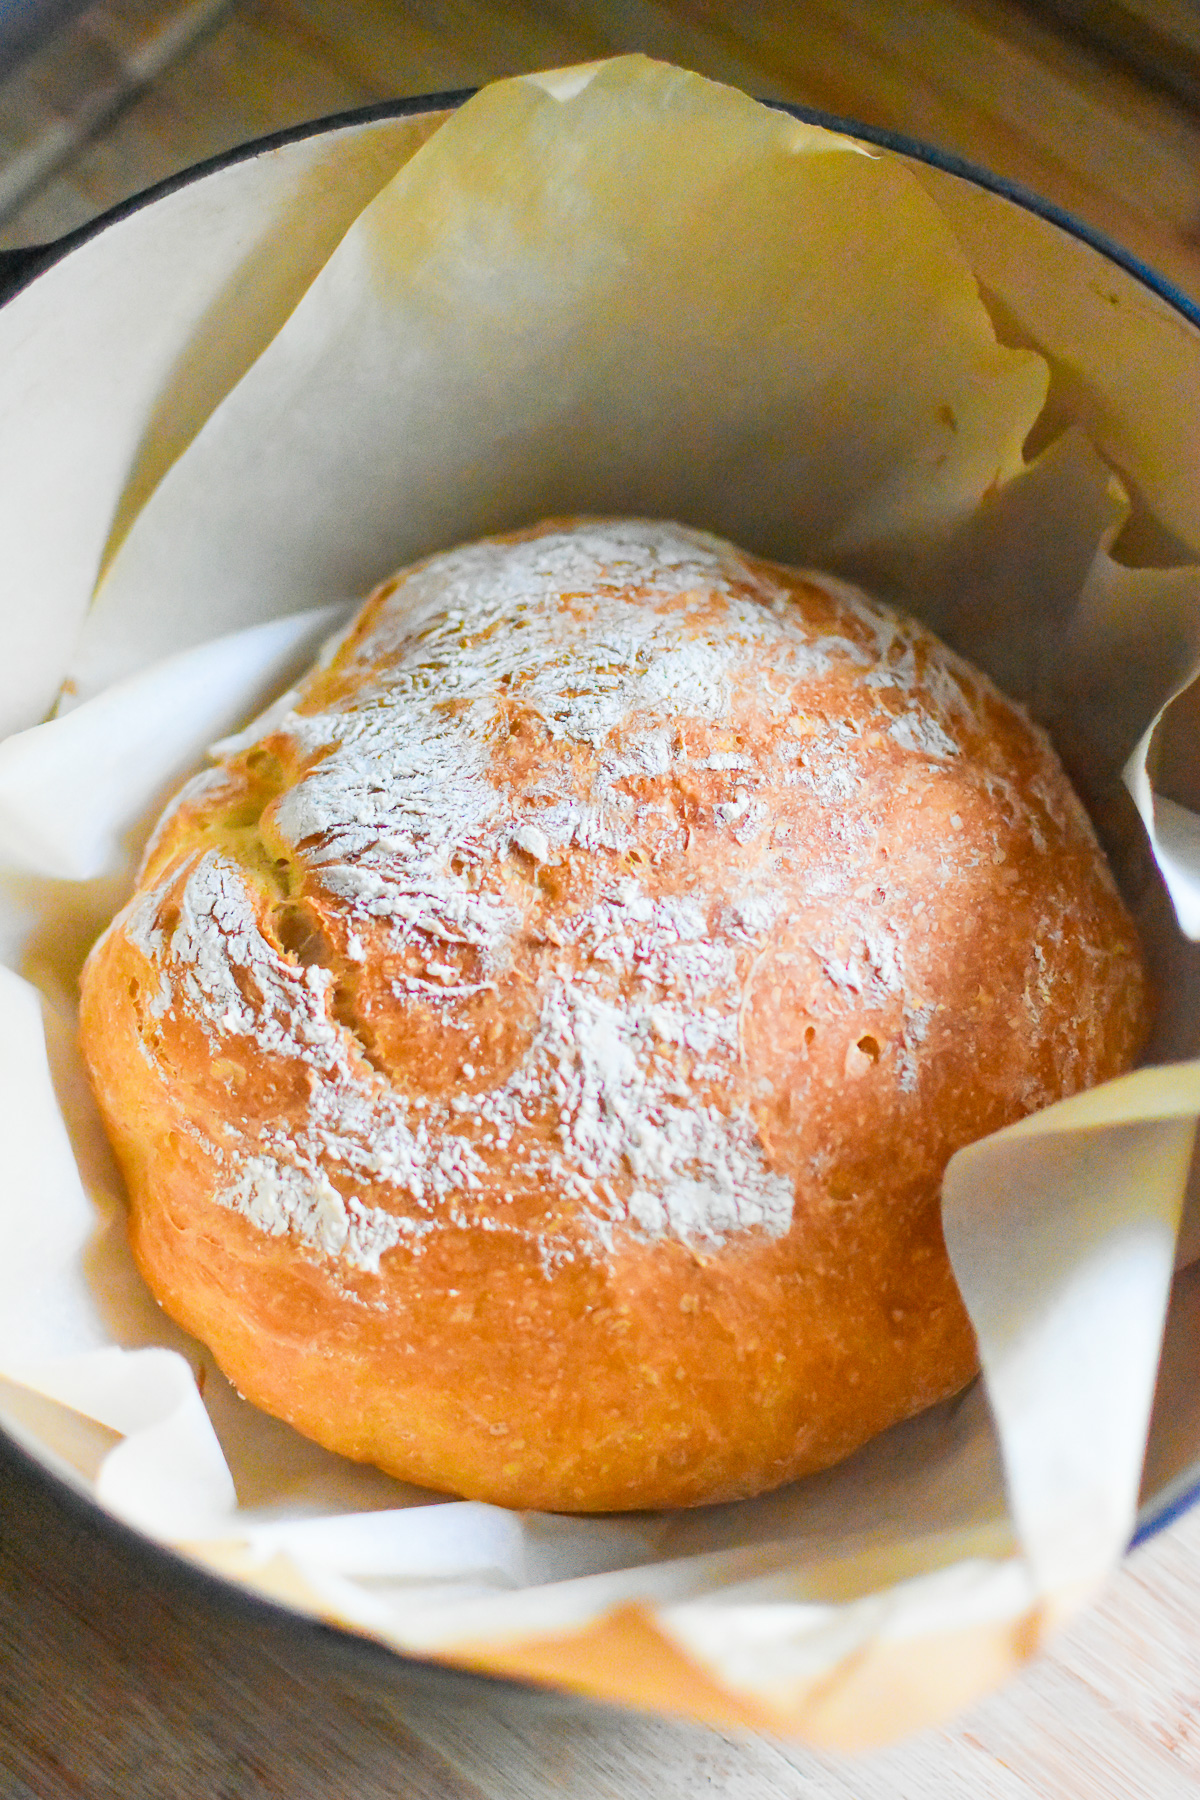
If you've ever been intimidated by the idea of making your own bread at home, my buttermilk bread recipe is the perfect place to start. This no-knead bread yields delicious, rich flavor in just a few easy steps! Making homemade bread has never been this simple.
And if you enjoy this recipe, you'll love my sweet agege bread, too!
Jump to:
❤️ Why You'll Love this Recipe
Easy to Make - This bread recipe with buttermilk and yeast is great for beginners because you don't even have to get your hands dirty. Just stir, let it rise, then bake. Not only do you not need a bread machine, but you won't actually need any appliances besides your oven!
Everyday Ingredients - Only five ingredients are required, and you probably have them in your kitchen already. No need to worry about keeping a starter alive. 😉
👉🏾 Buttermilk is one of my favorite underrated baking ingredients. If you believe in its magic, too, check out my cast iron skillet honey cornbread, super soft cinnamon rolls, and flaky old-school biscuits next!
Summarize + Save this Content on:
What You'll Need for this Recipe
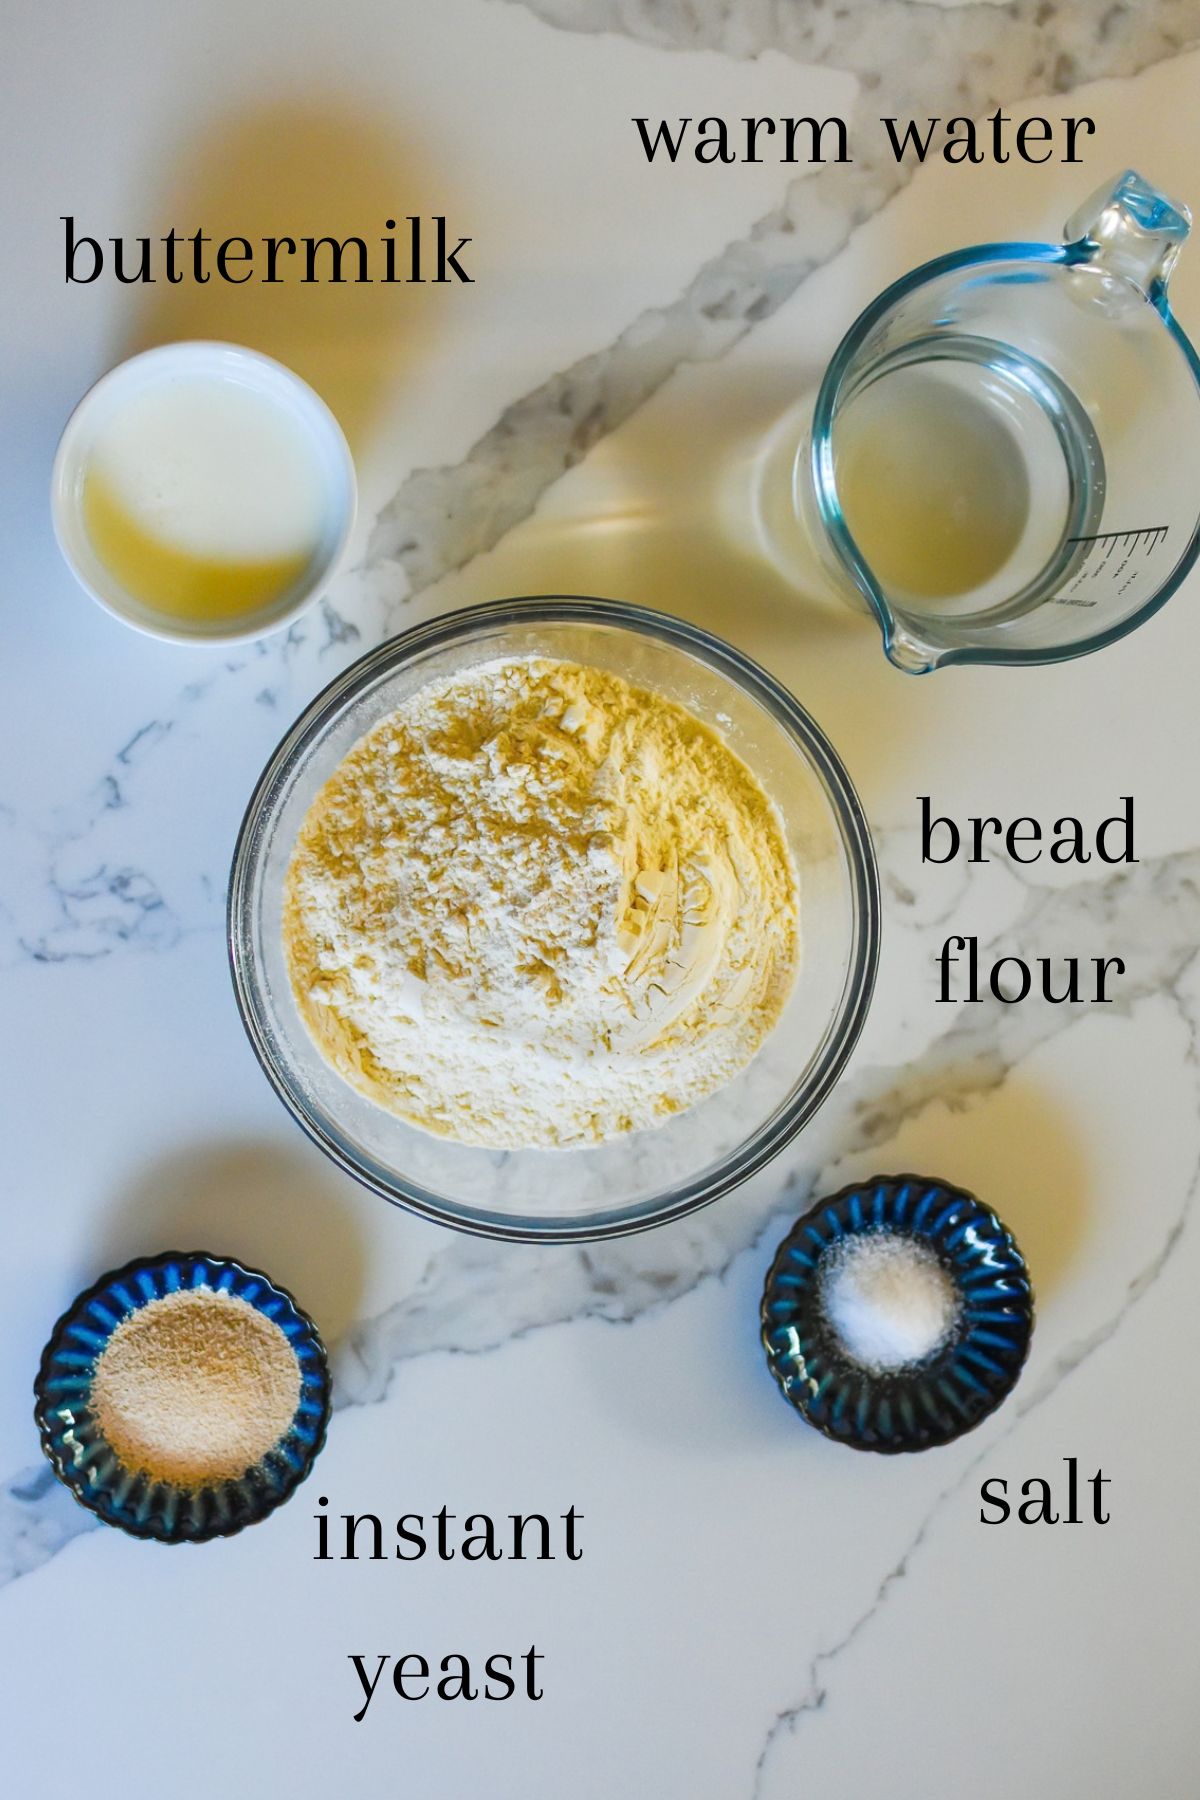
Bread Flour is the best option for making this recipe because it has a higher protein content than all-purpose flour, which gives the bread that chewy texture we know and love.
Buttermilk gives this bread a soft and tender crumb as well as a flavor that's buttery and slightly tangy. I call this my buttermilk sourdough bread recipe because the flavor is kind of similar!
Instant Yeast, also called rapid or quick-rise yeast, makes this recipe as simple as possible. No waiting for it to get foamy or anything. Just mix all the ingredients together.
Check out the recipe card below for full ingredients list, measurements, nutrition facts, and step-by-step instructions!
Substitutions & Variations
Overnight Method - You can bake this bread immediately after it rises, or let it chill in the fridge for up to 24 hours first. The longer rise time in the fridge slows down the enzymes in the buttermilk and yeast, so your dough won't become overproofed. But it will develop a deeper, more fermented flavor.
No Dutch Oven - Baking the bread in an enclosed pan--like a cast iron Dutch oven--allows the steam it releases to help cook it and create fluffiness. But you can achieve great results even if you don't have one--just use the notes in the recipe card below!
How to Make Buttermilk Bread
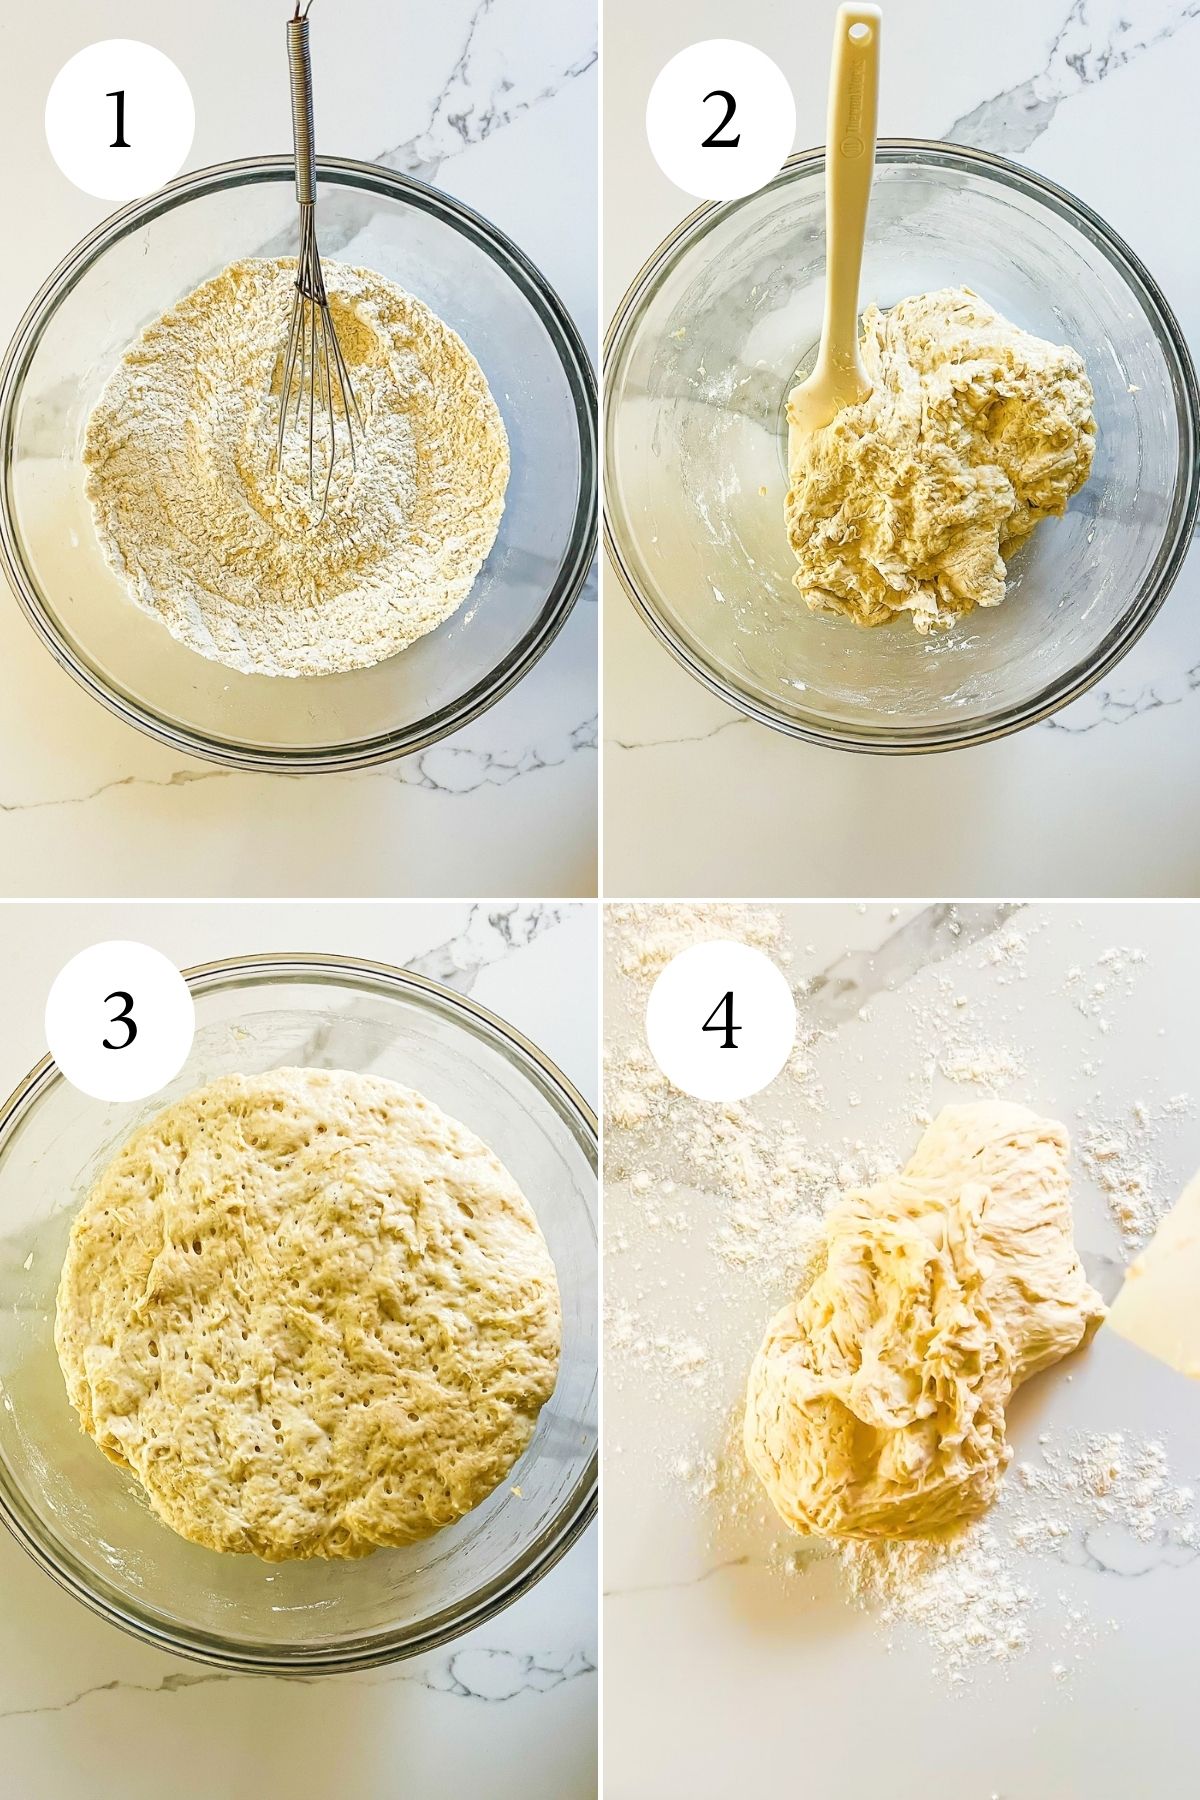
- Step One: Whisk the dry ingredients together, then stir in the buttermilk and water until a shaggy dough comes together. (Photos 1 and 2)
- Step Two: Cover the dough and let it rise until it doubles in size, then turn it out onto a floured surface. (Photos 3 and 4)
Pro Tip #1
The dough should rise in about 1-2 hours, depending on the temperature of your kitchen. I like to place mine in either a sunny window or in the (cold) oven with the oven light on.
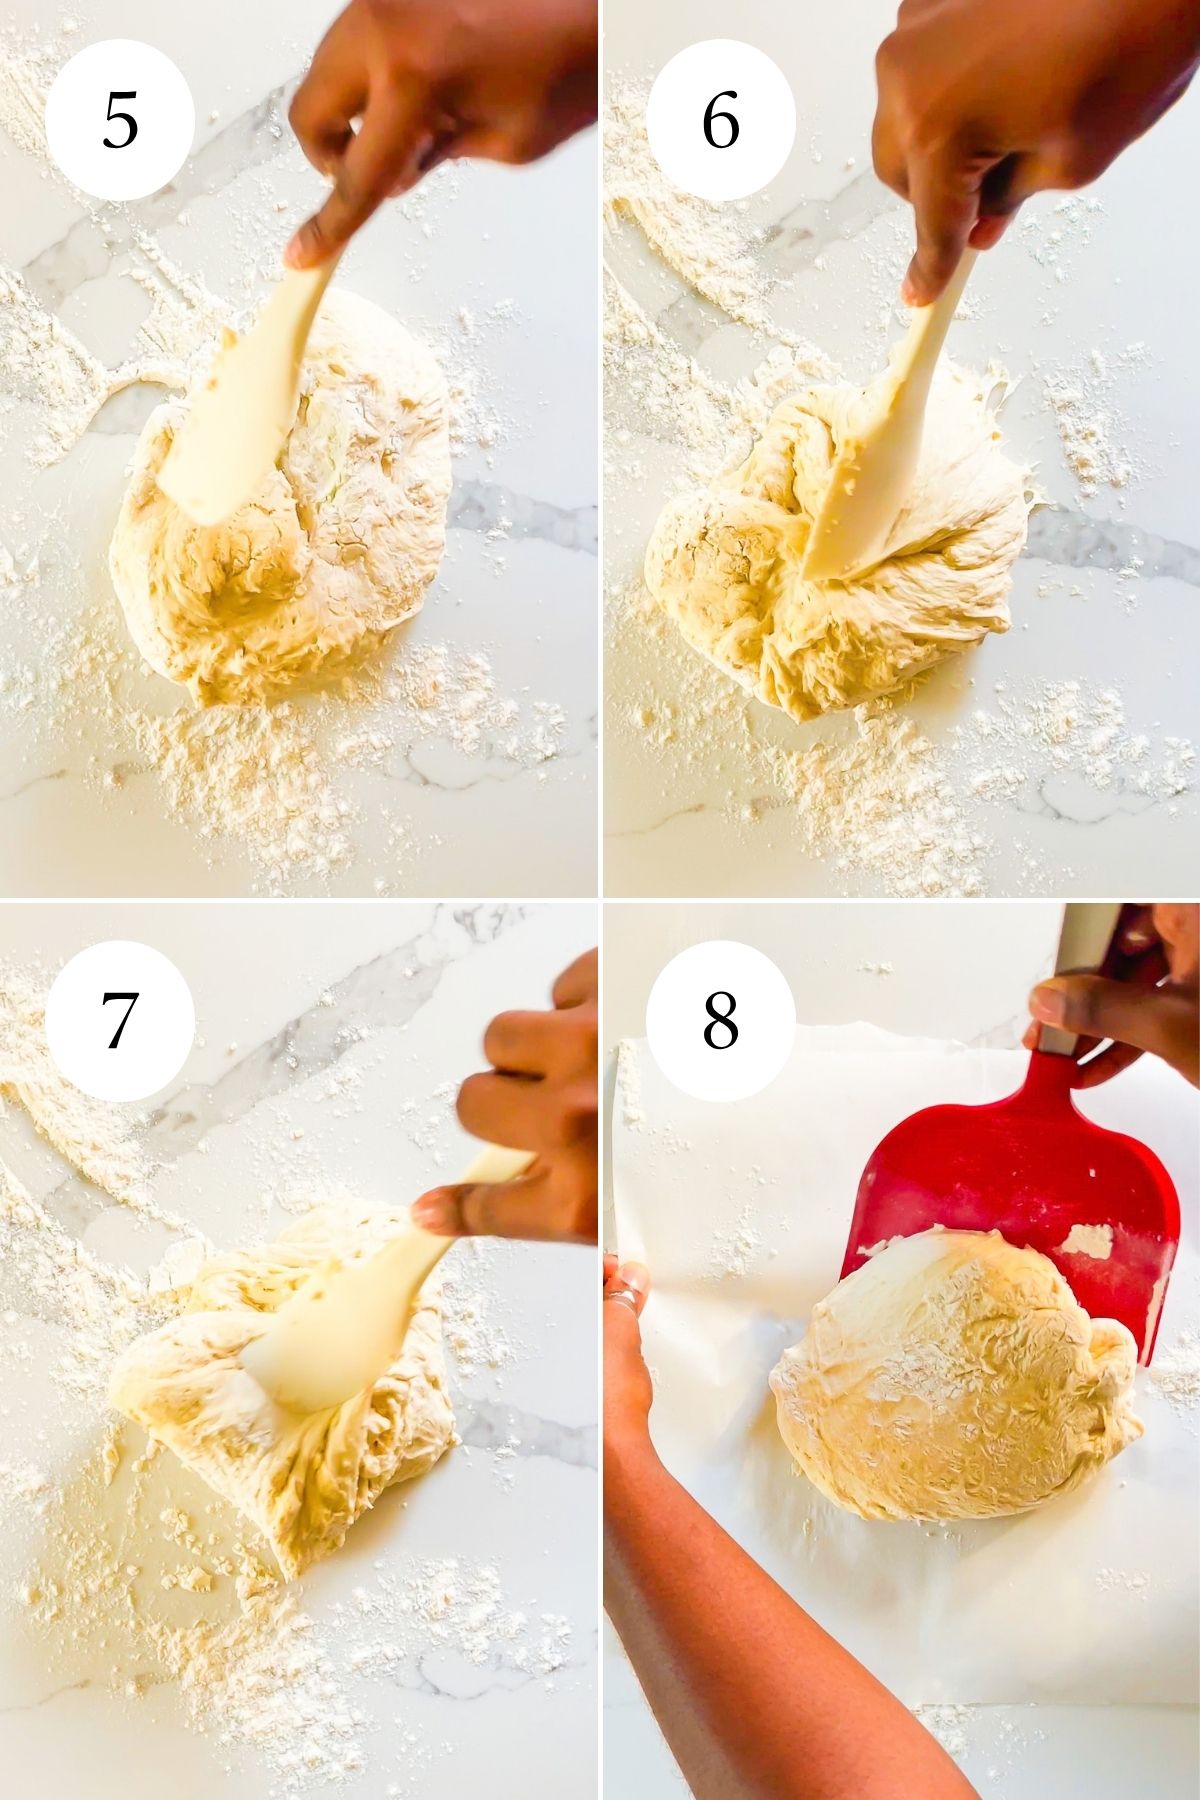
- Step Three: Fold all the edges of the dough into the center to create a smooth surface on the bottom. (Photos 5-7)
- Step Four: Flip the dough over onto parchment paper, and slide it into the center. (Photo 8)
Pro Tip #2
This dough comes out quite sticky, so I like to use a silicone spatula or kitchen spoon to fold it, and a regular spatula to flip it.
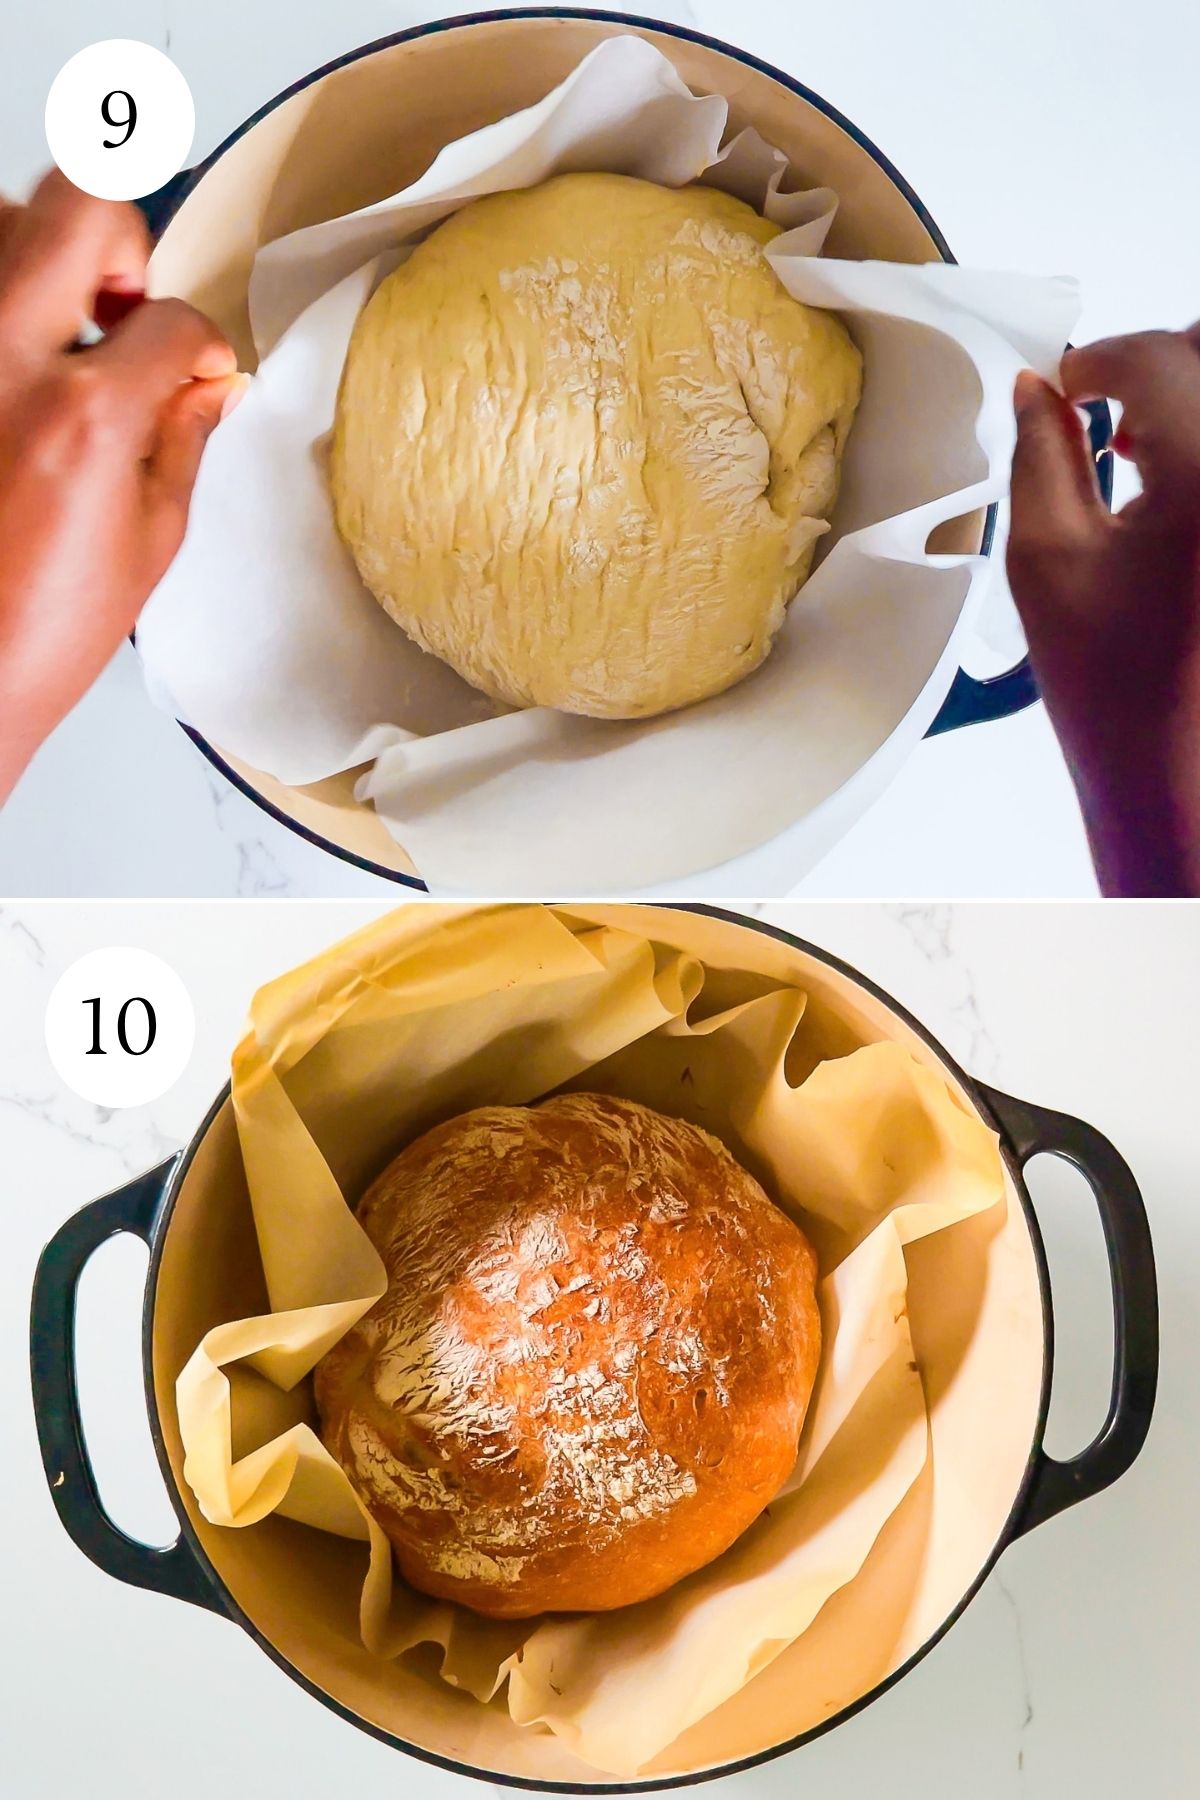
- Step Five: Place the dough into a hot Dutch oven, then cover and bake until golden brown. (Photos 9 and 10)
Pro Tip #3
Placing the pot into the oven as it preheats gets it nice and hot, which encourages the dough to start releasing steam immediately, mimicking the fancy bread ovens of your favorite bakery!
Frequently Asked Questions
To maintain the bread's soft texture, store it at room temperature. You can wrap it loosely in plastic wrap, parchment, or foil; just let it fully cool to room temperature first.
To freeze, cut the room-temperature loaf into slices, then transfer to an airtight, freezer-safe container or bag. It will keep in the freezer for up to three months.
How to Serve
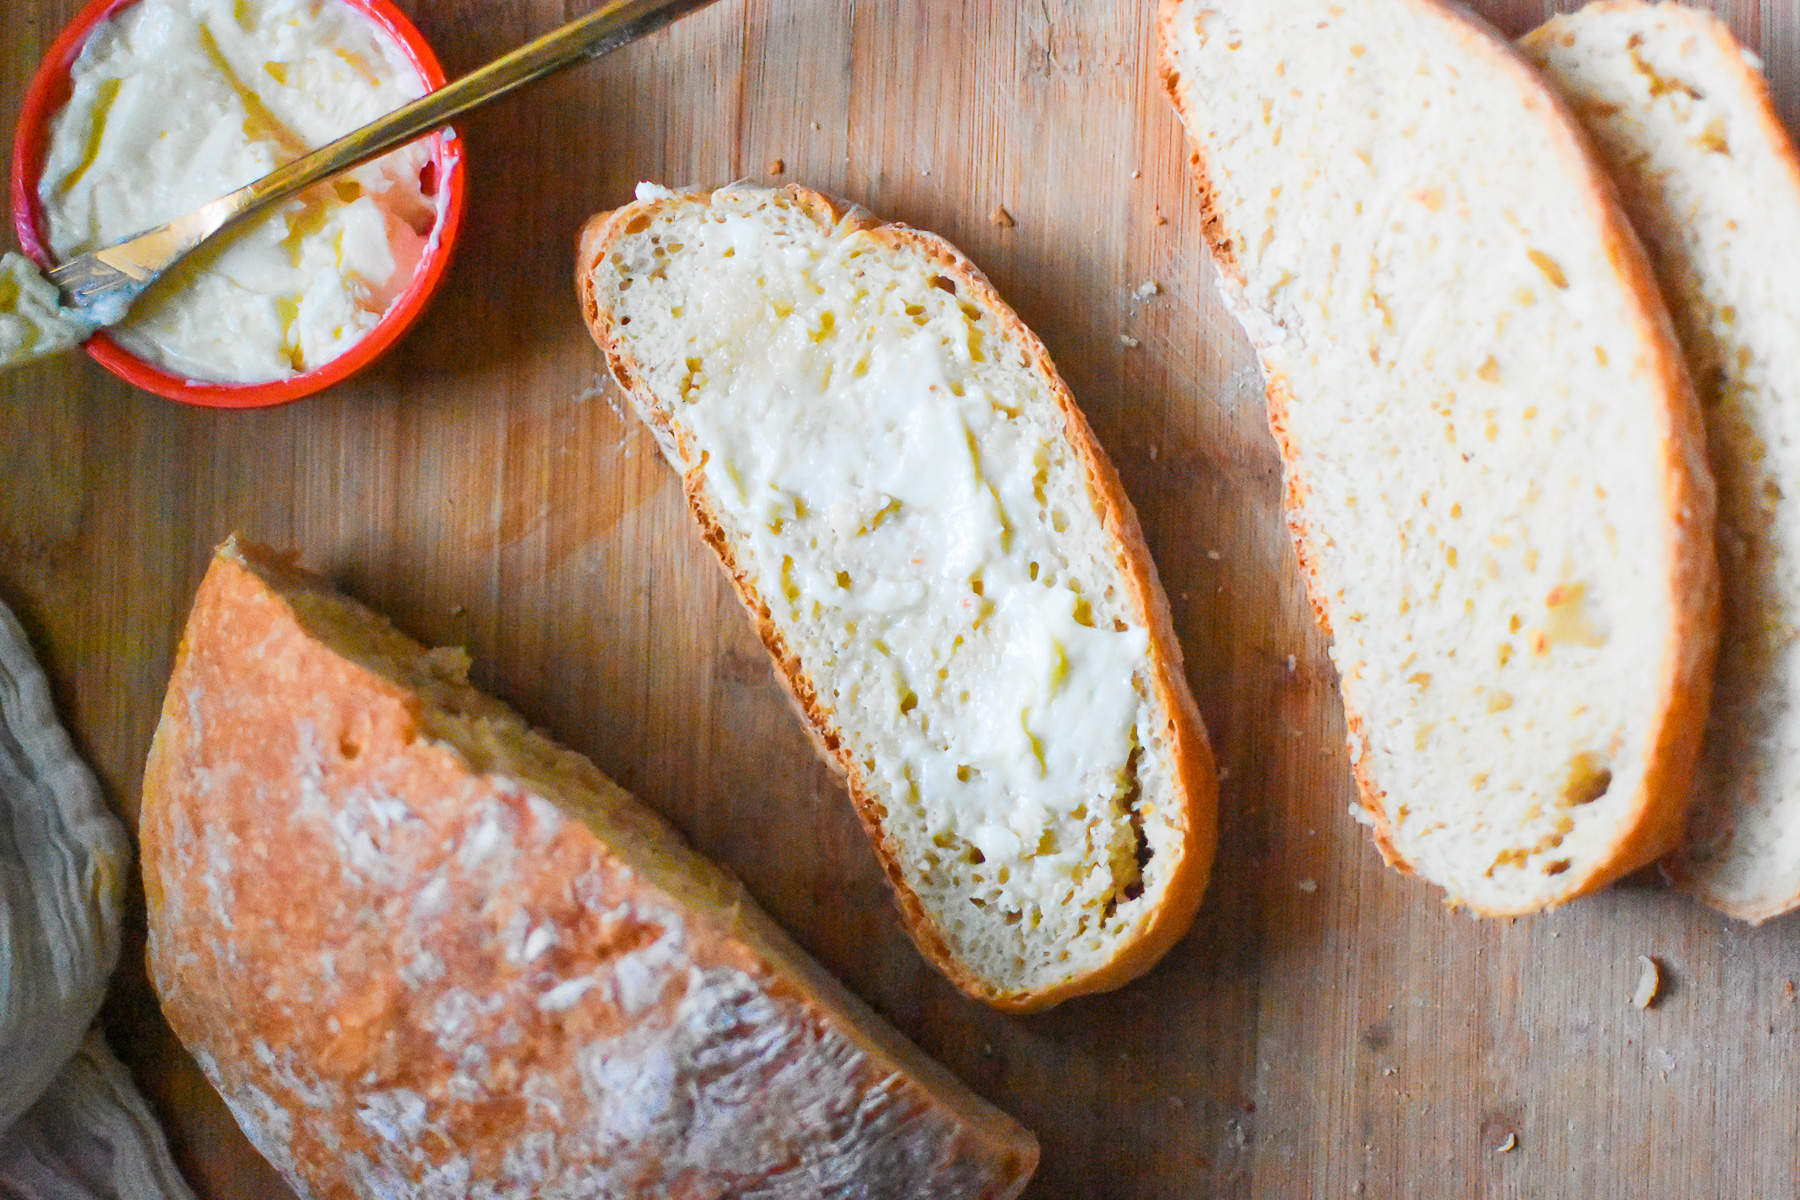
Temperature: In my opinion, this crusty buttermilk bread is best when enjoyed warm, but you can eat it at room temp, too.
Pairings: Slather your slices with butter and honey or jelly. Compote, preserves, and homemade jam are also great ideas!
Occasions: This bread works for virtually any meal. Toast it for breakfast. Use it to make tuna fish sandwiches. Serve it alongside a cozy pumpkin soup for dinner.
More Favorite Homemade Bread Recipes
Looking for other recipes like this? Try these:


I hope you'll enjoy this buttermilk artisan bread recipe soon and very soon. And sharing is caring, so be sure to pin this recipe for later and follow me over on Pinterest. Thanks for reading!

📖 Recipe
Easy Buttermilk Bread (No-Knead Recipe!)
Equipment
- 1 silicone spatula or kitchen spoon
- 1 spatula optional
- 1 4-quart Dutch oven or loaf tin (see notes)
- 1 food thermometer optional
Ingredients
- 3 cups bread flour
- 1 cup water warmed to 110-120 degrees Fahrenheit
- ½ cup buttermilk at room temperature
- 7 grams instant yeast typically one packet
- 1 teaspoon fine sea salt
Instructions
- Make the Dough: In a large mixing bowl, whisk the flour, yeast, and salt together. Pour in the water and stir until the ingredients start coming together, then mix in the buttermilk. Continue stirring until the mixture is uniform.The dough should look wet, sticky, and shaggy.3 cups bread flour, 1 cup water, 7 grams instant yeast, 1 teaspoon fine sea salt, ½ cup buttermilk
- Let it Rise: Cover the bowl loosely, and set aside in a warm spot until the dough has doubled in size (about 1 ½ - 2 hours depending on the temperature of your kitchen). The dough should have a foamy look (a little like focaccia) and feel tacky to the touch.
- Shape and Bake the Loaf: Preheat oven to 450 degrees Fahrenheit, and place lidded Dutch oven on the center rack so that it will get hot as the oven preheats.
- Turn prepared dough out onto a floured surface, and fold its edges in towards the center of the dough to form a round. Flip the dough over onto a sheet of parchment paper so that the folded part is now on the bottom, then slide it into the center of the parchment.I find it easiest to use a silicone spatula or kitchen spoon to fold in the edges of the dough, and a regular flat spatula dusted with flour to move the dough around on the parchment.
- Use the parchment paper to lift the dough and carefully place it into the heated Dutch oven, then cover with lid. Transfer the covered pot to the oven to bake for 30 minutes, then remove and bake for another 5-10 minutes, or until golden brown with an internal temperature of 190 degrees Fahrenheit.When checking the temperature of your loaf, be sure not to hit the pot with the probe, as that will give you an incorrect read.
- Finish and Serve: Carefully remove the bread from the pot, and let it cool on a cooling rack or cutting board for at least 10-15 minutes before slicing. Serve warm.
Notes
- Place a large rectangular baking dish onto the bottom rack of the oven as it preheats.
- Meanwhile, bring a small saucepan or kettle of water to a boil.
- Once the oven is preheated, carefully pour the boiling water into the heated baking dish to create steam.
- Place the dough into a regular loaf pan, then palce then pan on the next rack above the pan of steaming water.


Love this recipe? Leave me a Comment!