
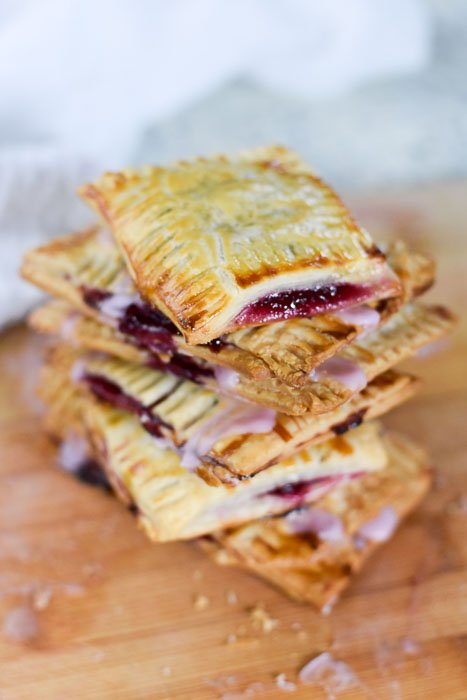
Learn to make your favorite classic breakfast toaster pastries with flaky crust and warm cherry filling easy--in about 30 minutes! Originally published August 2018. Last updated July 2023.
Some childhood classics never go out style and although I'm more mindful about what I eat as an adult, those cravings hit every now and then. Thankfully, this copycat pop tart recipe is just as good as the original and we know exactly what's in it. Let's get into the delicious details!
And if you enjoy this recipe, you'll also love my Cherry Lemon Ginger Pie or Cherry Appetizer Bites with Goat Cheese and Puff Pastry.

What do they taste like?
This is basically a cherry hand pie recipe. The filling is sweet, tart, and fruity. And you'll taste buttery bakery notes from the crust.
Check out my sweet cherry jam made with just two ingredients!

What You'll Need for this Recipe
This is technically a semi-homemade pop tart recipe made with common ingredients you can grab at the grocery store. Here are some of the key ingredients.
Cherries are the star of this show. I love to use fresh summer cherries to make the pop tarts in season but you can make DIY pop tarts year round with frozen cherries in the filling.
Pre-made Pie Crust - Most store-bought pie dough is circularly shaped, so I trim off the rounded edges to get squares, which are much easier to work with for this kind of project. Can I make the crust from scratch? Absolutely. My all-butter crust recipe is easy and adds about 30 minutes to the process if you want to make pop tarts from scratch.
Sugar enhances the natural sweetness of the cherries for the scratch-made pop tart filling. Feel free to use the sweetener of your choice if you don't have granulated sugar on hand.
Lemon balances out the sweetness in the fruit filling. I love fresh lemon juice here but concentrated lemon juice works, too.
Check out the recipe card below for full ingredient list, measurements, and step-by-step instructions!
More Favorite Summer Cherry Recipes
Cherry Apple Crisp in the Slow Cooker
Elderflower Cherry Gin Smash Cocktail

Tips & Tools
Grab a sharp knife and cutting board. You'll also need a cherry pitter to prep the cherries a saucepan to cook up the simple fruit filling. Bake the tarts on a sheet pan.
How to store? Seal homemade fruit pop tarts in an airtight container and refrigerate. They'll keep for about five days this way.

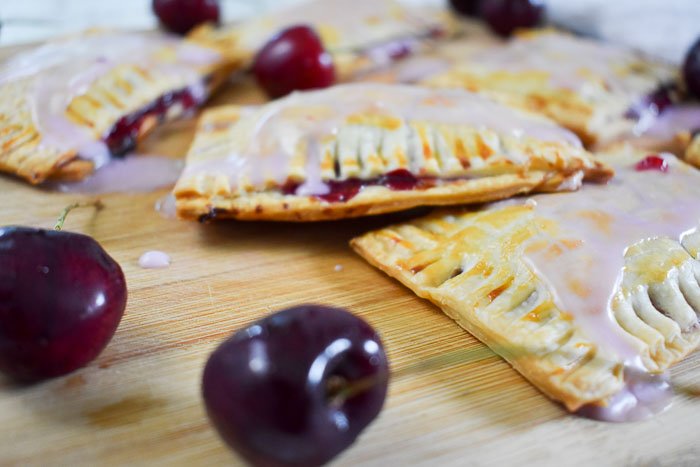
Making Cherry Pop Tart Glaze
The glaze is optional but so simple that you might as well do it. Just mix up powdered sugar with milk or water then squeeze a bit of cherry juice into it to get that pretty pink color. Whisk everything together then drizzle the glaze over your cooled homemade cherry pop tarts and just try not to drool!
More Fun Breakfast Recipes
Mimosa Pancakes with Champagne Syrup

How to Serve
These are yummy warm or cold but I prefer to eat them the same way as their less-desirable store-bought counterparts--warmed up. That way the crust is softer and the luscious, fruity filling is a little bubbly. Pair with some protein for a more balanced breakfast and turn on Rugrats for Saturday morning vibes.
I hope you'll enjoy a quick batch of homemade pop tarts soon and very soon. And sharing is caring so be sure to pin this recipe for later and follow me over on Pinterest. Thanks for reading!

How to Make Cherry Pop Tarts at Home
📖 Recipe

Easy Homemade Cherry Pop Tarts
Equipment
- 1 knife
Ingredients
For the Cherry Pop Tart Filling
- 2 cups cherries pitted
- ⅓ cup sugar
- ½ lemon squeezed for juice
- 1 tablespoon flour
- 1 tablespoon water
For the Pop Tart Crust
- 2 pre-made pie crusts
- 1 egg
For the Cherry Pop Tart Glaze
- 1 cup powdered sugar sifted
- 2-4 tablespoons milk or water
- 6 cherries
Instructions
To Make the Cherry Pop Tart Filling
- Add cherries, sugar, and lemon juice to a small saucepan over medium heat. Stir until sugar is dissolved and continue cooking until cherries release their juices and mixture is bubbly (about five minutes).
- Reduce heat to low. Press and mash cherries with a spoon to break them down. Vigorously whisk in flour and water then allow mixture to simmer until thickened (about five minutes).
- Remove saucepan from heat and transfer in refrigerator to chill and thicken further (about 30 minutes). Remove pie crust dough from refrigerator and thaw according to package instructions.
To Assemble the Pop Tarts
- Preheat oven to 400 degrees. Line a baking sheet with parchment paper and set aside. Crack egg into a small bowl and beat until smooth and uniform to form an egg wash. Set aside.
- Unroll thawed pie crust dough and cut the rounded edges and set aside off so you have two large squares of dough. Cut each square into six equal rectangles about 3" by 4" each. (If needed, roll the dough scraps--those previously removed rounded edges--into a ball and roll them out to cut out more rectangles.)
- Wet the edges of each rectangle of dough with a bit of water.
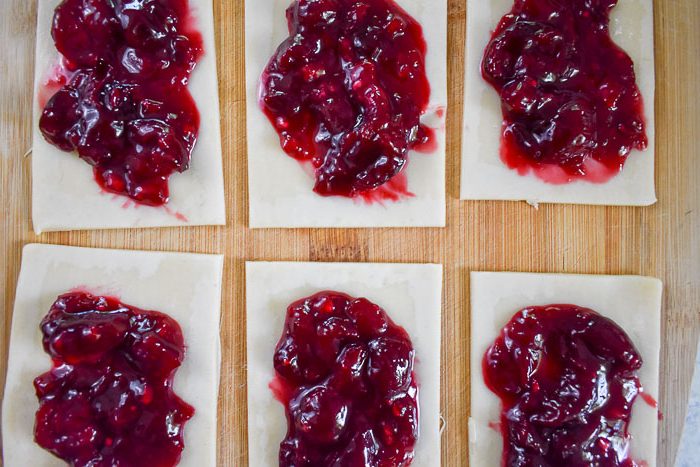
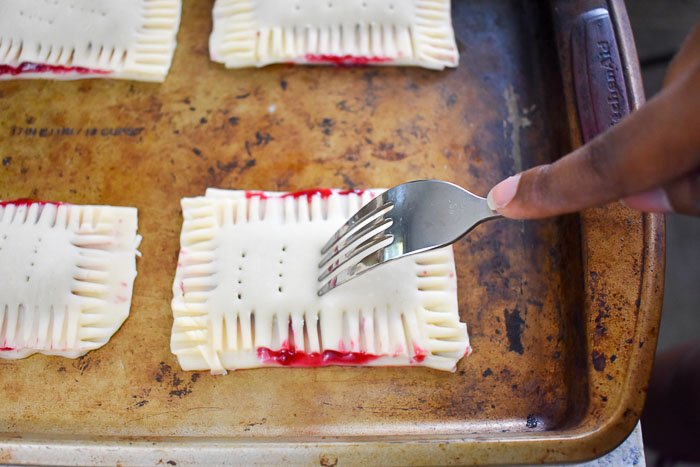
- Spoon one tablespoon or so of filling into the middle of six of the dough rectangles. Place the remaining rectangles over top and press the edges of each pop tart with a fork to seal.
- Transfer pop tarts on a baking sheet. Brush the tops of each pop tart with a bit of the egg wash then score each pop tart a few times with a fork. This allows steam from the filling to escape the tarts so they don't bubble up or burst.
- Place pan in oven and bake for about 15 minutes or until crust is golden brown and filling is bubbly.
To Make the Cherry Glaze
- While pop tarts cool, whisk together powdered sugar and milk in a bowl.
- Squeeze their cherries and allow their juice to drip into the glaze mixture. Whisk again until uniform and smooth.
- Drizzle glaze over top of pop tarts once they reach room temperature.

Marta says
We LOVED these cherry pop-tarts! I made them on Sunday to have to eat for breakfast throughout the week and they been so clutch. The kids have made a second batch because of how straightforward and easy to follow your recipe is. Thank you!
Mila Clarke Buckley says
I would take these over store-bought any day! Lovely Recipe!
Melissa says
Oh how perfect would these be for back to school grab-n-go breakfasts?!! So simple and delicious.
Jazz says
Yes, these would be great for back to school! Thanks for stopping by, Melissa.
Dawn says
Could you use cherry pie filling instead of fresh cherries?
Jazzmine Woodard says
Hi, Dawn! Yes, you can use cherry pie filling or even cherry jam instead of fresh cherries. You can also use frozen cherrie in equal measurement to replace the fresh cherries in this recipe. Hope this helps!
Mimi says
These look delicious. And what a great time-saver to use the pre-made crusts. Brilliant!
Paula @ I'm Busy Being Awesome says
YUM PopTarts were one of my favorite treats growing up. I love that I can now make my own and actually pronounce all of the ingredients in there 🙂