
Get the look of a $500 designer lamp in your home for about $20 with this easy DIY brushstroke lamp tutorial.
Remember the mood board I shared awhile back for my guest bedroom? Well, this lamp fulfills one not-so-tiny aspect of the look I am going for with it. Lamps might seem like an inconsequential part of the decor but they are integral, in my opinion. Soft, bedside lighting is just one of those things that makes a guest room, or any bedroom, more welcoming and user-friendly. Anyway, this particular lamp is inspired by the super popular (and super expensive) brushstroke lamp by interior designer Jana Bek. The brushstroke lamp first caught my eye over a year ago in Katey McFarlan's home tour before I even had a house to put it in.
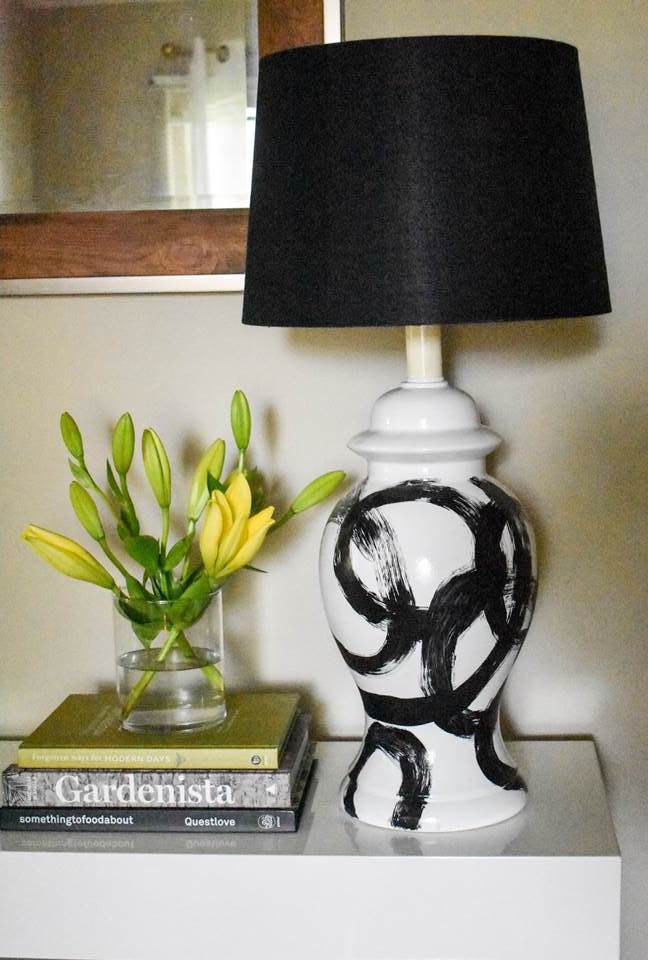
Now, I see them everywhere on Pinterest and other blogs, however, I just cannot swallow the price tag, especially for an item that is trendy and may not be a good fit years down the road. I'm not knocking anybody who can purchase a $500 lamp. I just can't do it. Even a tenth of that price would give me a brief moment of pause. So what's a girl to do? Make it herself, duh! I fancy myself to be a bit artistic and am not afraid of a DIY project. This is a great way to repurpose a lamp that you have around the house but may not be in love with. Without very much time or effort, this easy DIY brushstroke lamp tutorial happened for a fraction of a fraction of the price (about $20!). 🙂 The finished product is personalized, chic, and looks a little different from every angle. I love it!


Lampshade | Nesting Tables | Books: Gardenista, Something to Food About, Forgotten Ways for Modern Days
I purchased the lamp used here a few years ago from a thrift store and spray-painted it white (so no before pictures, unfortunately) for my grad school apartment but had not incorporated it anywhere in my house yet. I loved the shape so I held onto it to use somewhere in the house and it turned out the be the perfect canvas for my own brushstrokes. Topped with this lampshade from Target, the look was complete. Follow the instructions below to create your own in a few simple steps.
Easy DIY Brushstroke Lamp Tutorial
What You'll Need
- Lamp base (color and pattern do not matter since you will paint over it.)
- Plastic grocery bags
- Bandana or protective mask to use while spray painting
- White spray paint that does not require sanding or priming (I used this one)
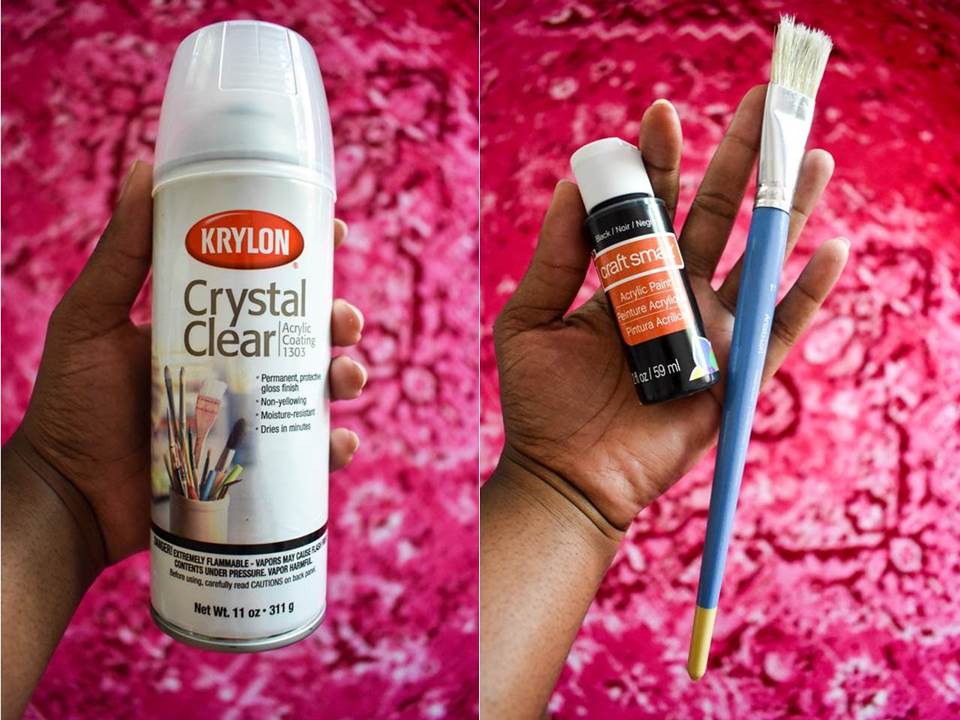
- Acrylic paint in color of your choice
- 1-inch paintbrush
- Clear gloss spray paint (I used this one)
Instructions
1. Make sure the lamp is clean and free from any dust, residue from price stickers, etc.
2. Cover top of lamp (where the bulb screws in) with a plastic grocery bag and tie securely. Repeat with the lamp cord. These steps will keep paint off those areas.
3. In a well-ventilated area, with your mask on (no offense to the #FutureHive), spray the lamp base with the white spray paint according to the directions on the can. You may need multiple coats and, if so, allow each one to dry or set before proceeding to the next.
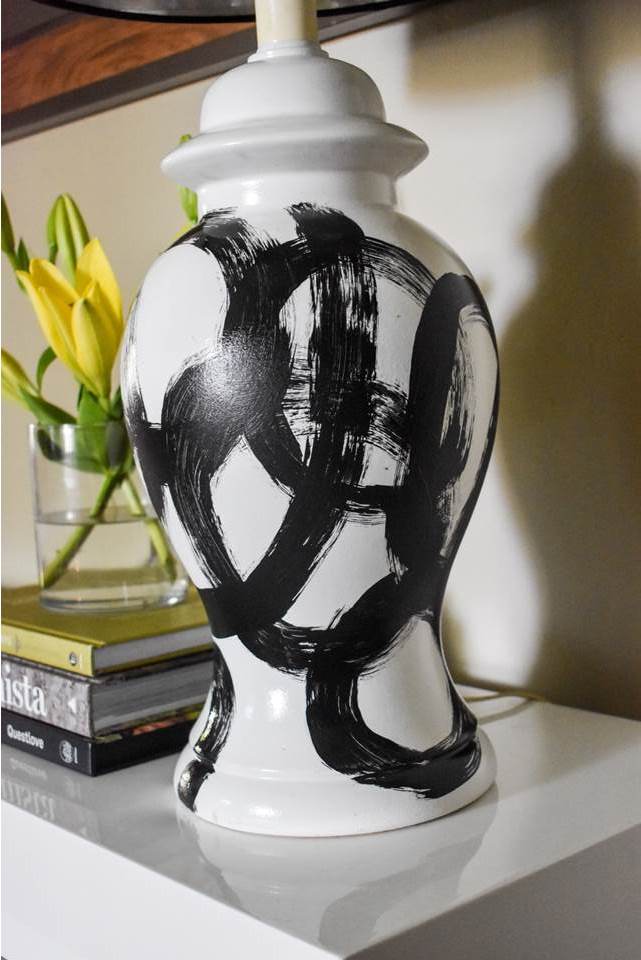
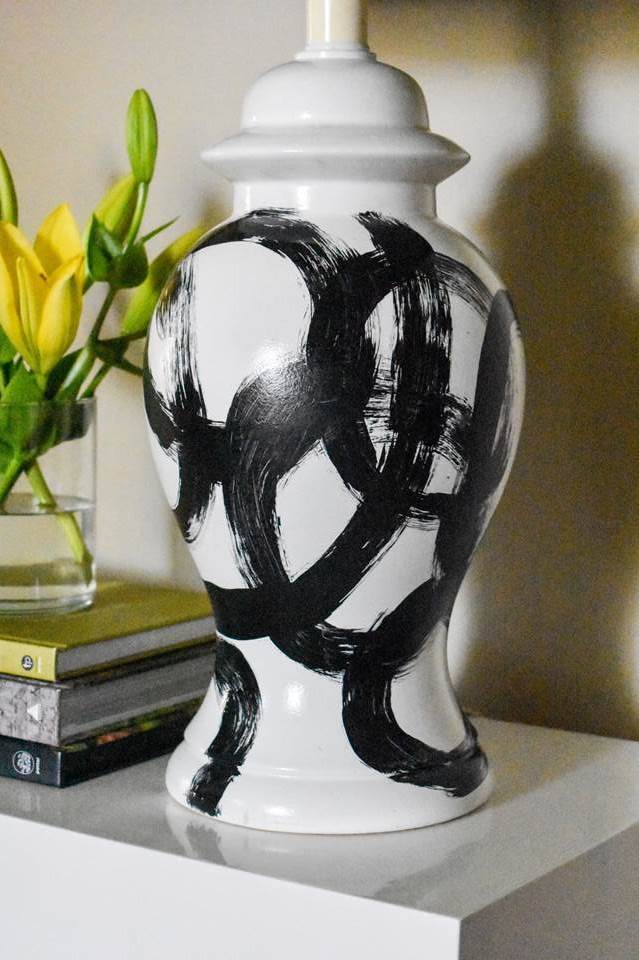
4. Using your 1-inch paintbrush and acrylic paint, paint overlapping circles, ovals, and arcs of different sizes to get the look you want. Be sure to wipe excess paint off your brush as you go so that the brushstrokes are visible. I recommend starting with just a little paint on the brush because you can always go back over the strokes with more as necessary. Make as few or as many as you want. The strokes are what make the finished product unique and full character so there's no right or wrong way to do it!

5. Once your brushstrokes are dry, finish with the clear gloss spray paint for a beautiful, glossy finish. I added another coat to my lamp after photographing it in order to achieve the even, hyper-glossy look I wanted. I used a full can for this lamp.
6. Remove the plastic bags, add a bulb, lampshade, and brush your shoulders off.

I hope this is helpful to you. I photographed this lamp in my living room and really like how it looks there so I plan to leave it until I finish getting the guest room together. for reading!
SaveSave


Leslie says
I’m in love with your lamp! It’s perfect and I’m loving that it doesn’t cost an arm to create.
Jazz says
Thanks, Leslie! I hope you get to recreate it.
Amber says
Ooh! I love a good DIY decor project. I am preparing to leave my nest next year, and have began collecting decor and inspiration already. This lamp will definitely be added to my list. It's chic and beautiful. I can, also, customize it even further to make it a one-of-a-kind. Thanks for sharing!
Emily Morrow says
Omg! I have the ugliest lamp that I could totally do this with. I was going to donate it and go shopping - this is way more fun not to mention more sustainable. Thanks!
Jazz says
No problem! I hope it turns out well. Thanks for reading!
Kristen Jones says
What a fun DIY project! I love how abstract it is 🙂
OohBother says
I literally JUST went to paint pottery with my kids this morning and I'm soooo wishing I would've seen this beforehand. Love this look so much!
Jen says
YES!!! I love it, an old thrift store find with an update. This lamp is so pretty, this project is right up my alley. I have to go on a thrifting spree now!
Jazz says
Thank you! I hope you find some great pieces.
21flavorsofsplendor says
Cute!! I have a lamp in my daughter's room that is just so plain and this is a great way to change it up.
Jazz says
Yes, this would be great for that. Thanks for reading!
Sam | Away She Went says
Your lamp turned out so cute! The brush strokes look so well done. You can't beat the price too, especially compared to the original. I love lamps, but can't imagine ever spending that much money on one!
Jasmine S. says
Super creative!! I would totally have bought that in a store!
Lisa says
What a fun project! I just bought a lamp at a garage sale I'm going to spray paint and try this on!